Showing posts with label crafting. Show all posts

Tuesday, December 19, 2017

Gingerbread house party 2017 - toddler edition!

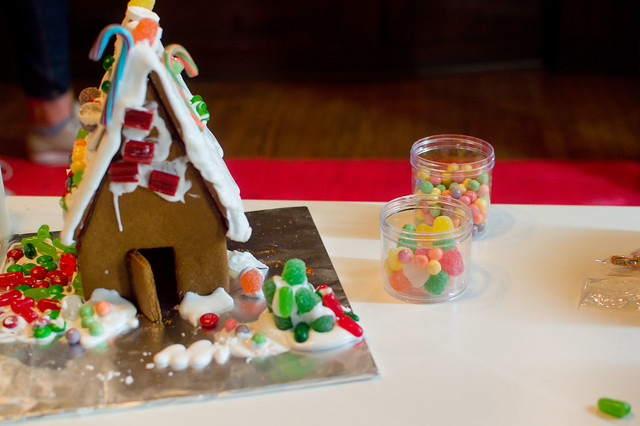
Whew. It's been a while, guys.* But I can't let December close out without documenting this year's gingerbread house party, which was pretty special. When I was looking at our guest list (um, two weeks ago, because this fall has been insane and I feel like I'm constantly behind) I realized that all our regulars have kids that are old enough to more or less work independently. So obviously it made sense to make this a toddler focused party, which is both much more fun and much more chaotic.

gingerbread house party 2017

gingerbread house party 2017

gingerbread house party 2017

gingerbread house party 2017

tuckered out

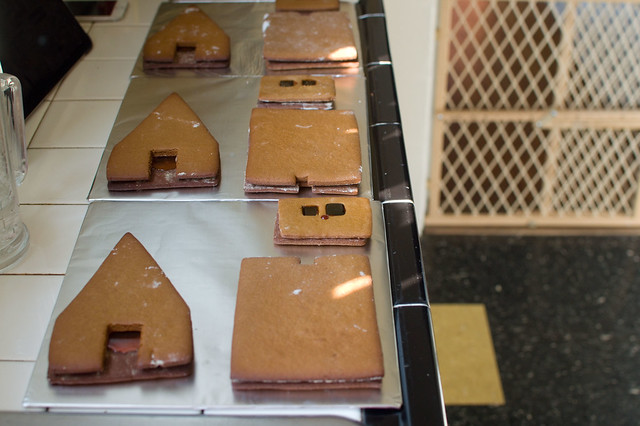
We had 7 toddlers (okay, one of them was a straight up baby, so he didn't participate this year) and 19 adults, which I was afraid was really pushing the limits of our house but it worked out so well. We only made houses for the kids, since even I am not crazy enough to try to tackle close to 30 gingerbread houses. Having a kid focused party was a little different than anything we'd done before, so I wanted to make sure that we had things set up for them.

The biggest adaptation we made was to set up a toddler height table, and this was a lifesaver. I had nightmares of trying to prevent kids from falling off of benches and chairs the entire afternoon, and bringing the game down to their level meant that we could supervise without having to hover anxiously. We just pulled out our long office table (which is just an Ikea tabletop) and temporarily swapped the hairpin legs for simple coffee table height legs which D picked up at Lowes for $30 ($5/leg, 6 legs needed for a table our length). The legs take up almost no space, so we can easily stash them away which is good because I think this is what our party is going to look like for a few more years.

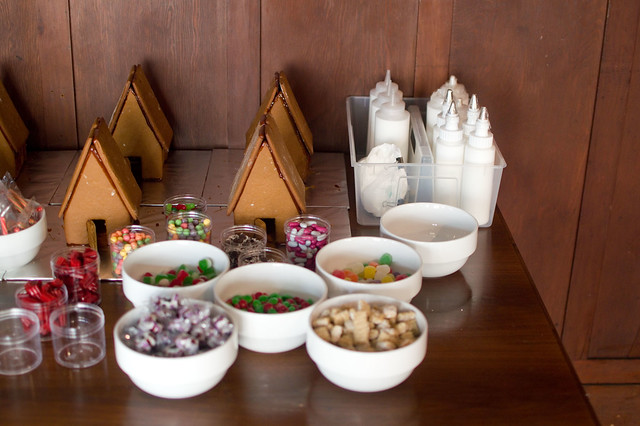
I also ditched the pastry bags, because let's be honest, even adults have some difficulty managing those things and we didn't want to deal with royal icing explosions. I originally ordered a few squeeze bottles that have icing tip adapters (I ordered these ones from Michael's - I looked alllllll over to find ones that weren't teeny tiny, since most are intended for decorating sugar cookies and only hold a few ounces) but then realized that the kids don't really need fancy tips yet, so I also grabbed a six pack of condiment bottles from Smart & Final for way cheaper. The tips on these are pretty narrow, so I snipped them off a bit to get a wider opening. To fill them, I loaded the icing into a pastry bag and then piped it into the bottles (the necks are a bit narrow, so spooning icing in would take forever). These worked great! The kids still needed some help, but we had zero explosions.

We also covered our rug in plastic tablecloths, for obvious reasons, and put all appetizers (and the hot spiked cider) up on tables out of kid reach.

It was a little nutty in the best way possible, and I think the kids ended up having a really good time. I'm glad we managed to pull it off, even though it was a little last minute this year.

(See lots of details on past gingerbread house parties here, including the recipe I use, how I do the stained glass windows, and how we glue the houses together, and a general overview post of the party logistics)


* I miss this space! I miss you guys. Thank you for the sweet comments and concern. This year has been a little crazy and I'm barely keeping up with general life but I do want to make a point of getting back here more often. I'll have a few more posts up soon, on general holiday and life stuff.

Wednesday, March 8, 2017

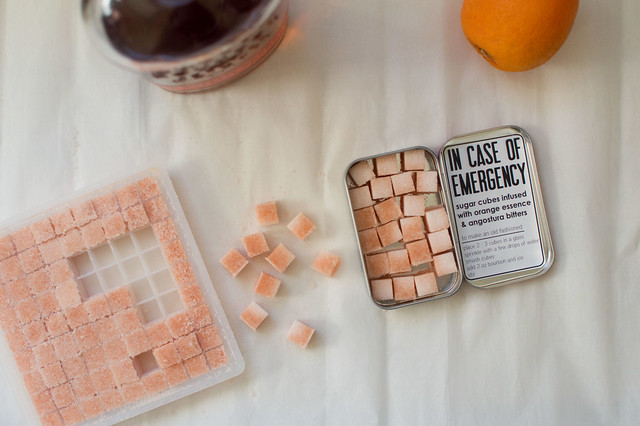
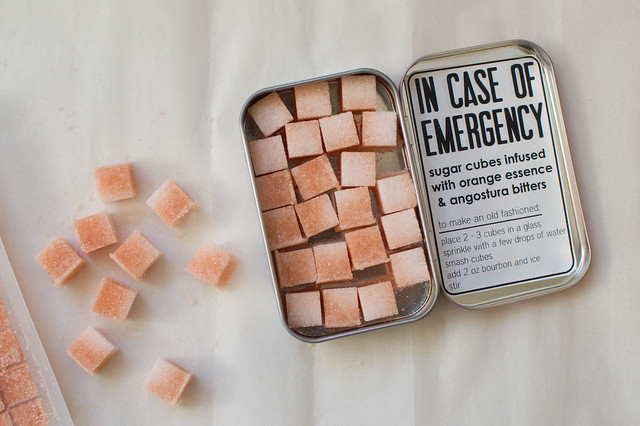
Sugar cubes infused with angostura bitters and orange (aka the instant old fashioned)

I've been contemplating this project for over a year and I finally got around to it over the holidays (and then made a couple more batches for quality control before writing this post). An old fashioned is one of my favorite cocktails, when it's done well (FYI - my current favorite in LA is from Melrose Umbrella Company). In the simplest form it consists of just bourbon, bitters and sugar, although personally I like a strong note of orange in mine so I always add that in.

At home I've played around with various methods and my best version involves an orange infused simple syrup, but that only lasts for a few weeks in the fridge and there are times where I don't feel like pulling out a saucepan just to make a cocktail.

Also, sugar cubes are cute and easily portable (read: camping, flights).

sugar cubes with orange and bitters

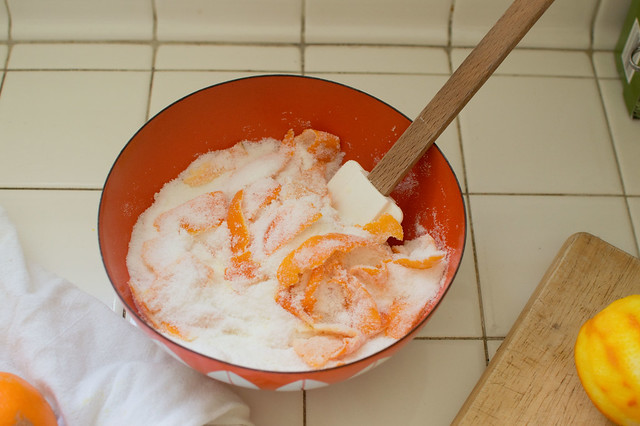
I looked pretty extensively online and found a couple of different methods for making your own sugar cubes, but I wanted a way to incorporate that orange flavor that I love. I was originally thinking about buying some orange essence oil and then it suddenly occurred to me that, duh, I am surrounded by fresh oranges this time of year and I should just go straight to the source. So the process starts with making a variation on an oleo saccharum, which is just a fancy way of saying that you're pulling all the delicious oil out of citrus peels. A traditional oleo saccharum has a very high peel to sugar ratio and you basically end up with liquid. I didn't want to go quite that far, so I upped the sugar ratio. After letting the sugar and citrus sit for 24 hours I pull out the peels and add in bitters to taste. The amount of bitters you need will vary widely depending on how sweet your oranges were, so you do have to taste. The first batch I made using oranges from my favorite farmer's market vendor, but they weren't super sweet and I ended up needing very little bitters at the end. The next two batches I made using navel oranges from my parents' tree and those were so sweet that I needed double the amount of bitters. Sorry - I know it's nicer if a recipe can tell you exactly how much of everything to add, but fruit just varies too much. I recommend tasting tiny bites of the sugar mixture as you add in the bitters, and when you think you have it perfect you should mix up a quick old fashioned using the sugar. If it's too bitter, add in a bit more sugar. If it's not bitter enough, keep going. Warning - make scaled down cocktails for tasting and keep in mind that unless your alcohol tolerance is sky high, you won't be able to fine tune it much at this point.

sugar cubes with orange and bitters

I wanted to be able to package them for friends, so I designed a label that would fit inside an Altoids tin because we had those lying around. I washed the tins multiple times with soap so that the peppermint scent was completely gone. If you want to do the same, the printable PDF with the labels is right here (pretty sure this goes without saying, but personal use only, please!). If you don't have a crazy Altoid addiction like us, these blank tins look to be the right size.
Sugar cubes infused with angostura bitters and orange (makes two trays full of tightly packed cubes, plus a bit left over) I use these trays and I love them - each tray makes 81 cubes, so you get 162 cubes per batch, enough for 50 - 80 drinks 
2 cups superfine sugar (I just quickly blitz regular sugar in my food processor)
4 oranges, peeled (you are just using the peels)
Angostura bitters, to taste (somewhere in the range of 15 - 30 dashes) 
Combine the orange peels with the sugar in a non-reactive bowl (glass or enamel, NOT metal) and allow to sit for about 24 hours.  
The next day the sugar should be fairly damp. Pull out the orange peels (it is really tempting to snack on them as you do this, but WAIT - if you snack on orange peels you will totally blow out your taste buds and make the next step harder).  
Start adding bitters. I'd start with 10 dashes, take a tiny taste and see if the flavor is coming through. You're also getting bitter flavor from the orange peels themselves, so a lot depends on your fruit. For early season farmer's market oranges, I used 12 dashes of bitters. For peak season homegrown oranges I needed 25 dashes. If you overshoot, you can add a bit more sugar. 
Once the sugar is adjusted to your taste you start pressing it into the trays. I work on a large sheet of parchment paper and just dump sugar all over the tray, press it in using a wedge shaped offset spatula, and then scoop up the extra that spilled on the parchment and pack that on top. I want these cubes to be as perfectly shaped as possible, so after I fill the whole tray I go back and use the base of a chopstick to tamp each cube down, then add a bit more sugar, then tamp it down again. It's a little fussy, but the whole process still doesn't take more than 15 minutes. 
Allow to dry thoroughly. We had a damp winter, so I actually left the trays in my oven for a couple days so that the pilot light could help speed up the drying process. If you do this I'd recommend putting a huge note on the front of the oven door to remind yourself to pull the trays out before turning on the oven. Speaking from personal experience here. 
Once they're fully dry you just pop them out of the trays and package them up. Store them in a dry, dark place, since they'll lose color more quickly if exposed to light. 
You can use them in an old fashioned (instructions on the printable labels) or just drop one in the bottom of a champagne flute for a quick and pretty cocktail.

You could easily play with this method and make different flavor combinations. I'm thinking of doing a grapefruit and rosemary version for summer cocktails but the possibilities are endless, really.


making the oleo sacchrum
{oleo saccharum in progress}


Wednesday, May 4, 2016

Cuteness

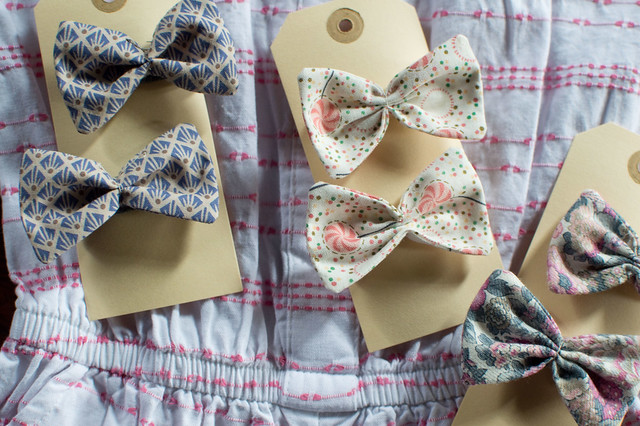
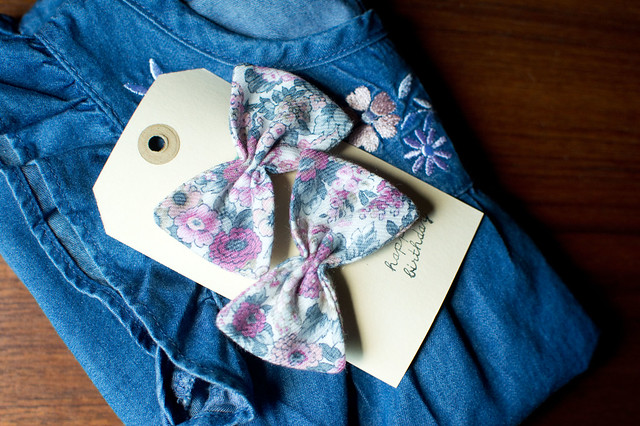
There are a lot of babies in my life right now, and it's been way too long since I did a little sewing project. So naturally - baby bows!

baby bows

A couple weekends ago I messed around with some fabric until I figured out what I wanted to do, and then I whipped up a bunch of these assembly line style. It felt really good to sew a little something again. I attached them to some little clips that I had lying around from way back when I used to have an Etsy shop (#hoarder).

bows and denim

I paired them with some clothes from Target for a quick birthday gift. Adding a little something handmade is always fun.

I made these pretty sturdy but we'll see if they hold up to baby tugging. I mailed a couple sets to my niece and she definitely thinks it's a game to pull them out of her hair (and then immediately hold them back up against her head so we can admire her).

Wednesday, January 20, 2016

More pillows!

I was on a roll after making my crocheted pillow cover (and looking for someone I could pawn the second one off on) so I made some throw pillows for my sister, a project that's been on the back burner for over a year now, when she first mentioned that she'd like some. This is the only gift I attempted this year and I'm really happy with them. She has our dad's old leather couch, which he had for as long as I can remember. He never had throw pillows for it (too manly?) but every time I visit her we talk about how it should have some.

Now she does.

Untitled
pillows on my couch, not the leather one

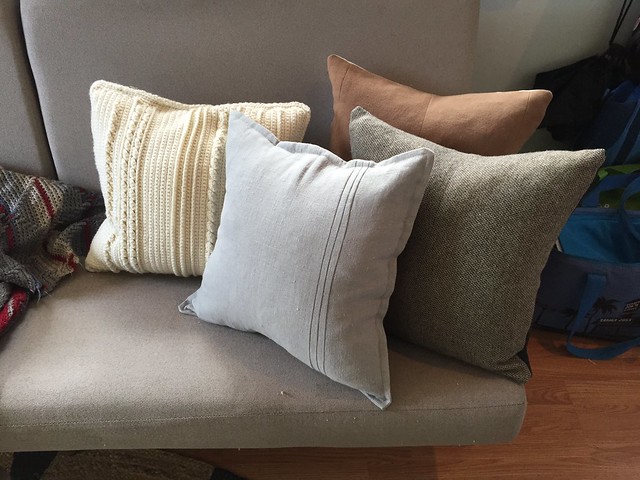
That couch has always felt very classic and masculine and I wanted the pillows to be in keeping with it. I decided to go with a clothing theme, if that makes sense. I had the crocheted pillow, which is reminiscent of a sweater. The camel and the houndstooth are cashmere fabrics that I salvaged from thrifted men's coats and they're backed with linen (white for the camel, black for the houndstooth). The grey one is a nice heavy duty linen that I got at Ikea (best source for good cotton/linen solids) and I gave it some pintuck pleats for good measure (and then promptly made myself one because I love how it turned out).

These Ikea pillow inserts are the best. 20" square, down filled, inexpensive. They aren't super plump, so I sew my pillow cases a bit small (17" or 18" square) and kind of stuff them in there. I like an overstuffed pillow because you don't have to fluff it up as often.

Throw pillows are pretty simple but I still manage to spend a lot of time on them, especially when I haven't done them in a while. For these I used an envelope style closure* in the back and then added a couple of buttons on each. Since they're overstuffed the buttons help prevent gaping.

This reminded me that it isn't that hard to do these little projects I keep putting off.  I can be really lazy about pulling out the sewing machine, but the end result is so satisfying. Maybe I'll actually hem those curtains that have been dragging 2" on our floor for the last six months.

* I was looking back for the tutorial I used the last time I made slip covers and was bummed to discover that the page is gone. But this tutorial has a nice explanation and works really well for the 20" inserts.

Tuesday, January 19, 2016

Not an afghan

Back in December I decided to treat myself to a crochet project. I used to love crocheting, but I stopped because I was working pretty intensely in the lab at the time and all of it combined was aggravating my wrists. So it's been years since I crocheted anything, but I was craving it and I told myself I'd be careful.

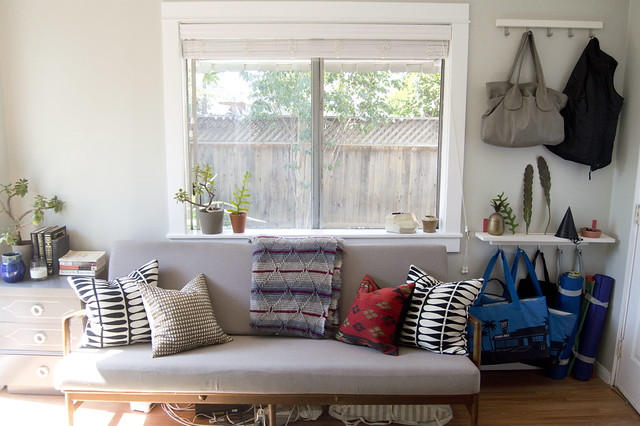
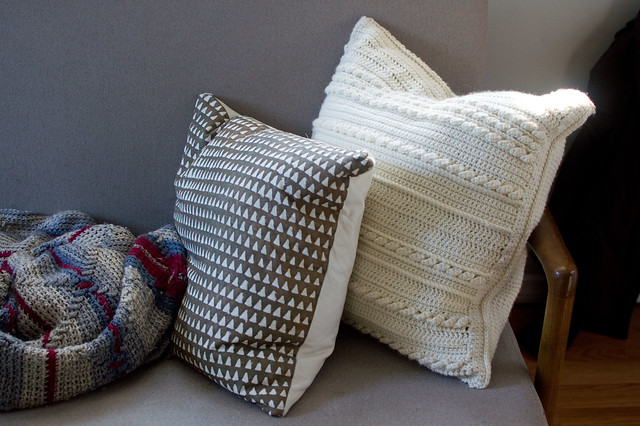
I started about three different afghans and pulled them apart and finally decided that what I really wanted was a cover for our throw pillows. See, we've had these black and white Ikea cases that we picked up almost a decade ago and I was getting so sick of looking at them.

I mean, they're fine, I guess. I was just tired of them.

couch
{old pillows}

Voila.

crocheted cover

 (Except it was less voila and more like being hunkered down on the couch for an entire season of Gilmore Girls while I messed around with different sized hooks and learned some new stitches - deeply satisfying craft time.)

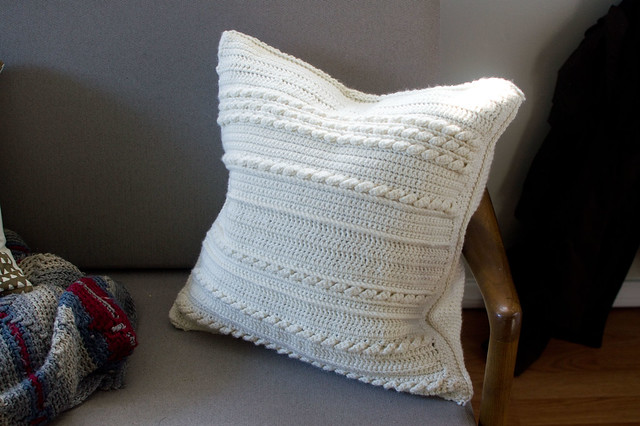
"new" pillow
{new pillow}

It plays nicely with our gold and cream West Elm pillow (that I am not yet sick of) and it brightens up the whole couch, although you can't tell from this photo because it's been gloooomy around here and all my photos are coming out blah. I was so happy with how it turned out that I immediately made another one, and then another one, and then cut myself off because I started to worry that this would become my version of the doily and soon our entire house would be slip covered in chunky crochet.

I don't have exact instructions, but here are the details - I wanted something as close to knitting as possible (I should really learn how to knit) because I wanted a lot of texture. I ended up searching for ages to find more information about Aran crochet. The pattern I found most useful is this one. It's for an afghan, but it does a nice job of clearly describing several different stitches that create great texture. I worked through the rows a couple times on a test basis, just doing a short piece instead of the length they call for. Once I felt like I was comfortable with the stitches, I started on the pillowcase. The base is single crochet and then I would throw in rows of pattern randomly. For this pillow I just used the front ridge and cable patterns. I stopped when I had the right size front (about 17" square for my 20" pillow insert). Then I created two back panels out of single crochet so I could do an envelope closure in back. On one of the pieces I skipped a few stitches about 3/4" in from the edge to create buttonholes. At the end I pinned all the pieces together and then pieced them together by running a quick slip stitch along the edges.

Tuesday, January 12, 2016

Ornament for Dad

Untitled

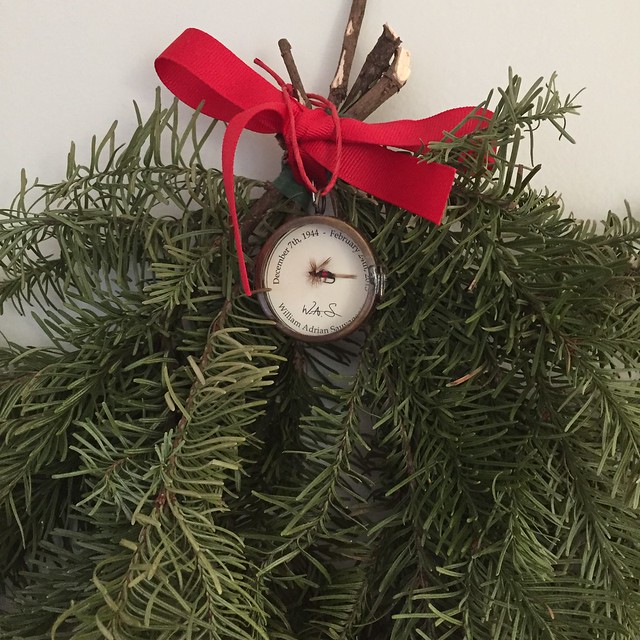
My sister and I made these ornaments for my dad's birthday this year. He was born in early December, so it seemed appropriate to have something we could put on the tree (or the wreath, in tight quarters) each year.

I designed the background in Illustrator and included his initials in his handwriting, which I scanned from a letter and cleaned up in Photoshop.

The central piece is a fly that my dad hand-tied for fly-fishing. He was an avid fly-fisherman and always tied his own lures, so we have a really beautiful collection of them and we chose some of our favorites for the ornaments.

I spent forever looking for the right type of ornament and finally realized I should be searching under jewelry findings. I wanted something that felt classic and a little antique-y. I ended up purchasing these shadowbox lockets from this Etsy seller. They were perfect. I did as the seller suggested and sealed them with E6000, since they aren't meant to be opened up repeatedly.

I haven't put it away yet and I probably won't this year, but in the future I think it will be nice to pull it out of the box each year as we're decorating the tree, which always falls right around his birthday.

Wednesday, August 19, 2015

Under the bed storage for Malm

This is a long overdue post because we've been using these under the bed storage boxes for a few months now. But they're great! Our current place feels just right for us, but at 400ish sf we definitely had to do a lot of downsizing and we still came up a little short on storage. We got more ruthless with our clothes, which means we can fit everything we own into one dresser and one closet. But because the bedroom is small we had to put the dresser in the closet, which meant there was absolutely nowhere for our shoes to go. Neither of us was quite ready to commit to living with two pairs each, so we went searching for other options.

We've had a low Malm bedframe for the last decade and it's served us well. It's survived three moves without any sign of distress. The only downside to the low bed is that you can't get storage containers to go under it. I prefer not to store stuff under the bed, honestly, so that's never been an issue. But when you're living in a small space, that real estate suddenly becomes very valuable.

If you get a higher framed Malm, you can actually get drawers that are made specifically for the bed and work perfectly with it. For a hot second (okay, fine, two days) we actually considered getting rid of our bed and buying a whole new one just so we could have the drawers. But all we really needed was space for our shoes and I knew we didn't need large drawers for that.

We looked for storage boxes that would work, but the clearance on the low Malm is just about 4 inches and we had a hard time finding anything decent.

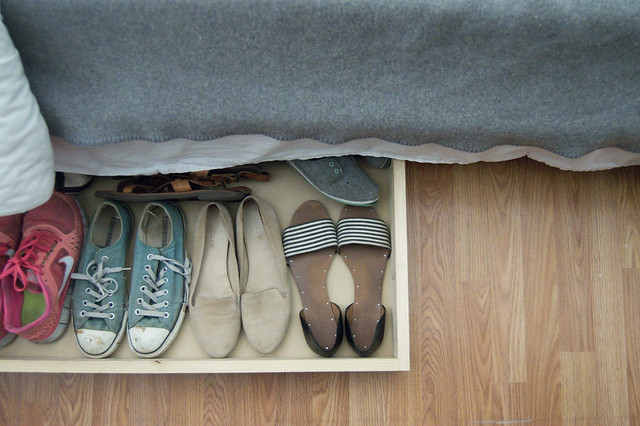
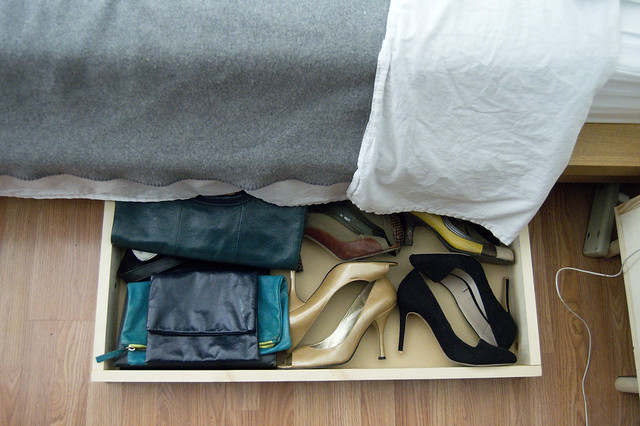
Instead, Dustin built out some simple wooden boxes for us in just the right dimensions. Because they are sliding in and out on wood floors, we added strips of felt on the bottom edges so they'd glide easily.

underbed shoe storage
{apologies for my incredibly non-inspirational shoe collection - shoes are 100% not my thing so I just wear them into the ground and then dread shopping for new ones}
shoe storage

They aren't tall enough for heels, but you can easily lay them sideways instead.

The next step is going to be adding a dust cover. I plan to just get some large pieces of felt, tack them down in the back and then weight down the front edge so it drapes nicely over the front of the box. This way we can easily pull the cover back to access the shoes but it will keep dust out. (Um, yeah. I still haven't done this but I'm happy to report that dust hasn't been a big issue)

I'm so happy with how these turned out and they're actually easier than our previous closet storage solution. Instead of leaving my shoes in a pile by the door I'm pretty good about putting them away as soon as I get home.

Thursday, July 10, 2014

And so it goes ...

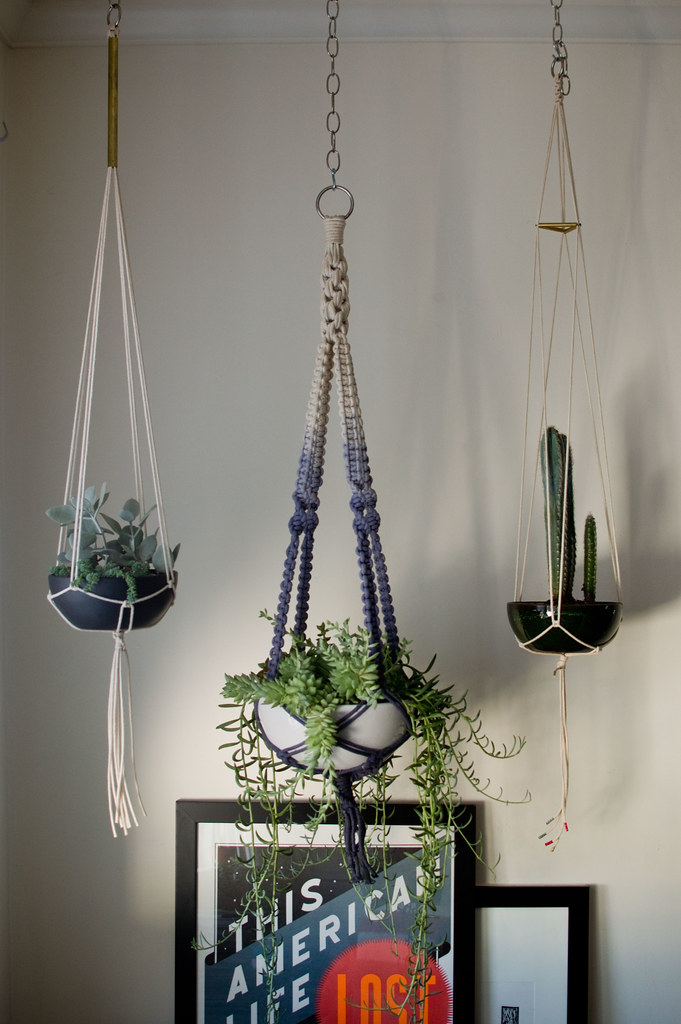
As soon as I had that first planter hung I started thinking about two more. I wanted something that would balance the first one, which is pretty intricate, so I decided to go both simpler and smaller.

planter trio
{planter trio}

We're still adjusting the heights (and I am really sad that I didn't have brass rings and brass chain, so that everything is totally matching) but I think it's going to be good.

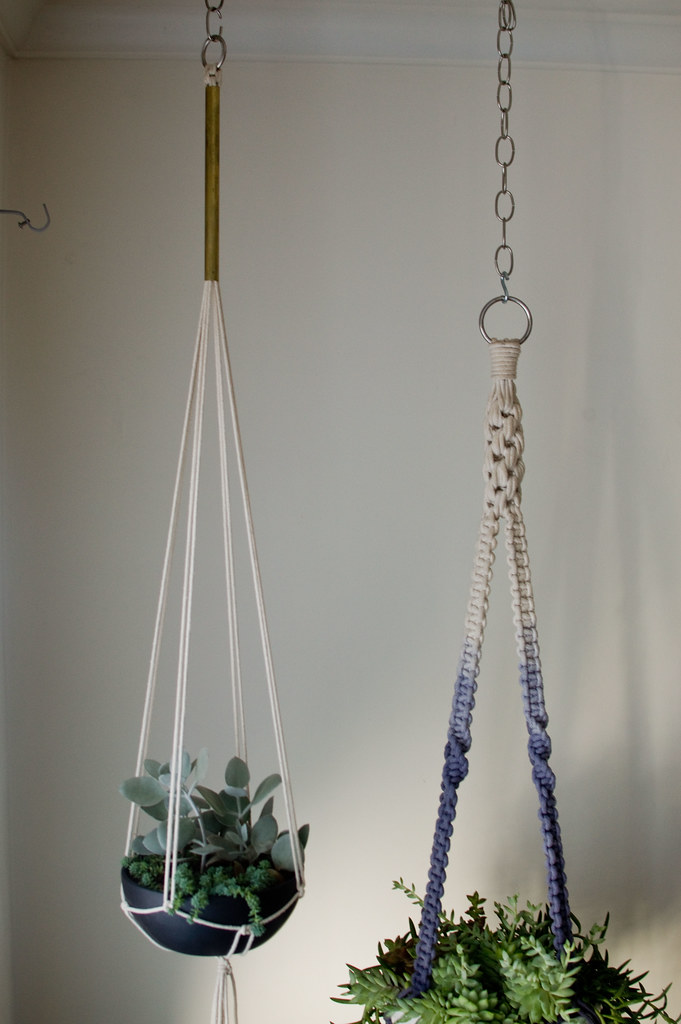
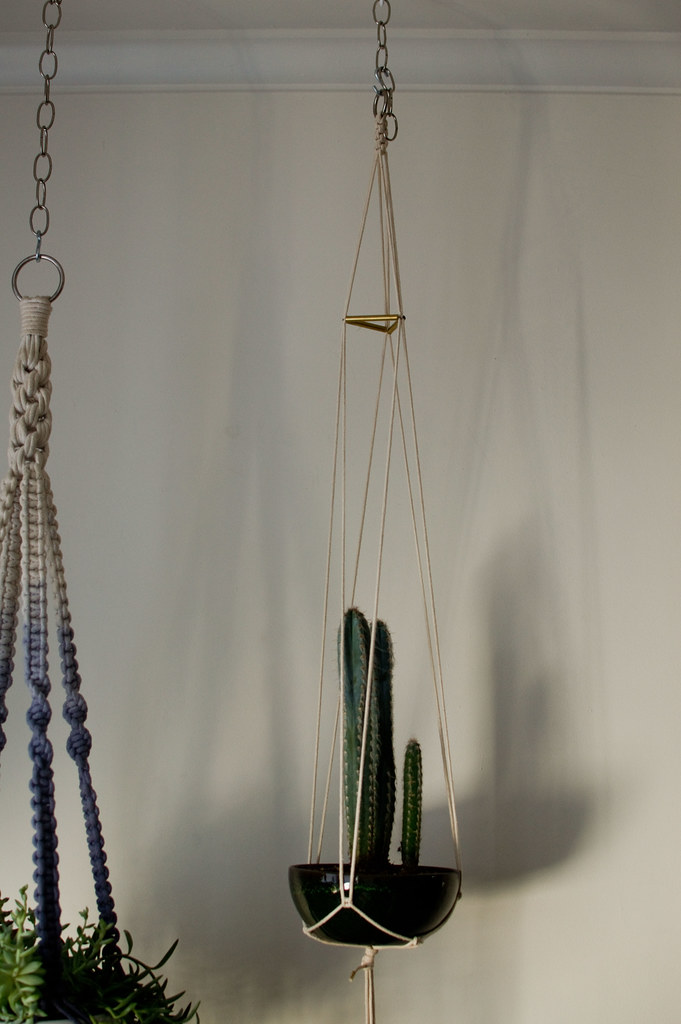
I didn't work with a tutorial for these. I knew I wanted brass incorporated in both and I knew I wanted to try out a tripod style for one. I just messed around with them a bit and because there are so few knots they came together really quickly. The bowls are from the same line as the larger white one, also from Sunset Nursery. I used all cotton cord again but a much thinner one. D picked up the brass rods at the hardware store.

For the one on the left I just used a length of brass rod and threaded the cord through it.

brass rod
{brass rod}

The one on the right was a little more complicated, but I basically just threaded the strands through the three pieces and then threaded some clear fishing line through to make the triangle a little sturdier.

brass triangle
{brass triangle}

But maybe just a little dessert bowl sized one should be floating in the back, closer to the wall? I think I'm just making up excuses now.


Just ignore the fact that we're apparently never going to get around to hanging any more of our artwork.

Thursday, June 5, 2014

Greenery

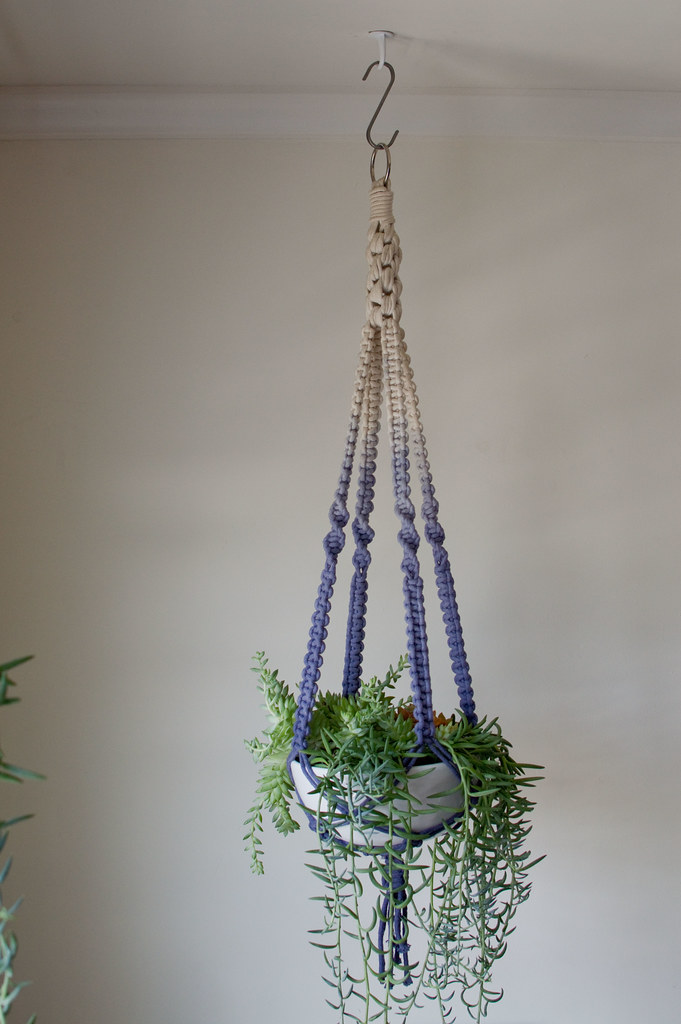
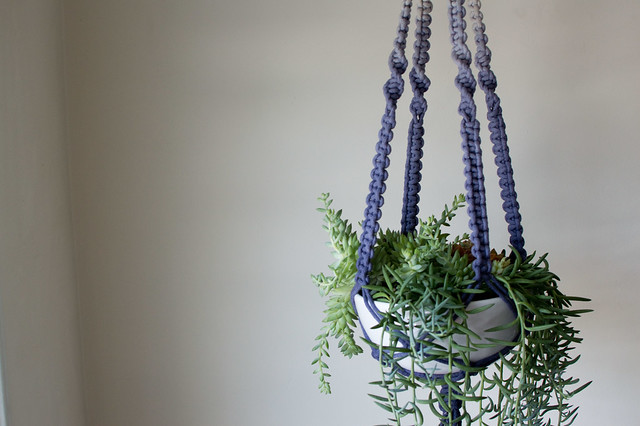
The finished product! It only took two months for me to get it dyed, planted and hung.

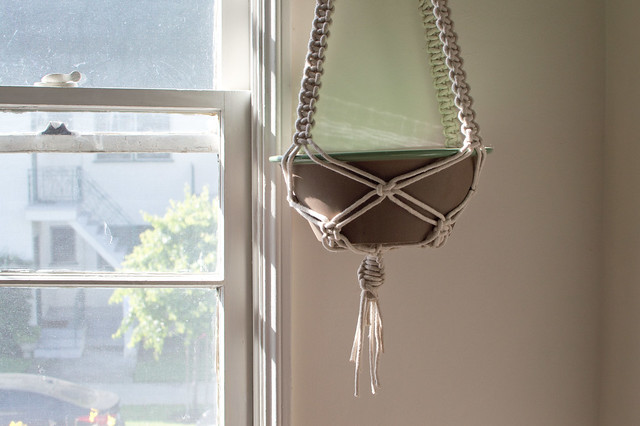
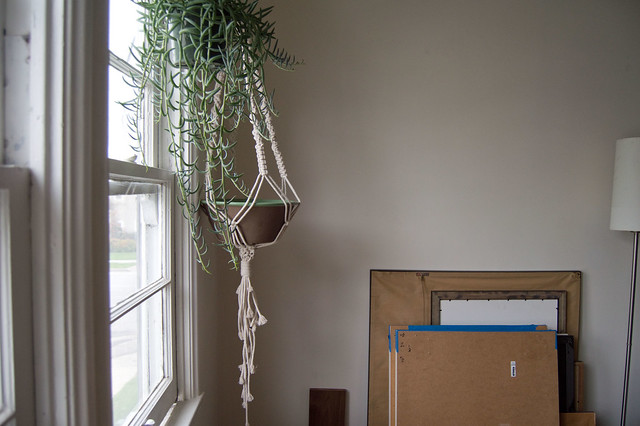
macrame planter
{macramé planter}

I will say this, macramé is satisfyingly mindless. You get to tie a bunch of knots! If you've ever spent a long summer making friendship bracelets or begging a camp counselor to give you more lanyard material, you are a prime candidate for learning macramé.

macrame planter
{macramé planter}

I started by searching all over for tutorials. I ended up mostly using this one, although I think it may be geared towards people with more experience because I had to do separate searches to learn how to tie each of the knots mentioned. I'd still recommend it to start with if you're willing to be patient. It makes you practice a lot of knots and you get a good sense for how to make a macramé plant hanger.

I bought two packages of this 6 mm cotton rope which I loved, although it is pretty thick so you end up needing more length. There are also thinner all cotton options available. If possible, I'd recommend seeking out an all cotton choice. It does cost a little more, and it takes a bit more practice to work with it but you can really see the difference in quality in the finished product. I tested out some synthetic clothesline and it was unpleasantly shiny and the texture wasn't great.

I made the entire hanger and then I tore it all out and redid it. That cotton cord isn't cheap and my knots were improving as I practiced more. The second effort has noticeably better tension than the first.

Knotting crafts are all about tension. Don't get frustrated if everything is looking wonky in the beginning. Relax, breathe, and practice. It takes a while to find your tension, so focus on that. Once you get a feel for it, everything will start to look better. If you are pulling as tight as is humanly possible, it will be difficult and uneven. If you're going in the other direction and not tightening enough, it will be loose and uneven. I don't think there's any way to have perfect tension immediately, so I resign myself to a learning curve anytime I try a new material and just know I'll have to take the work apart later.

The natural cotton looked beautiful on its own but I wanted something a little more modern, if that's possible with a hanging plant that we'll apparently be treating like a baby until we manage to kill it. I dip dyed it navy and I don't even care if ombré is on its way out. The glossy white pot is an inexpensive planter from Sunset Nursery.

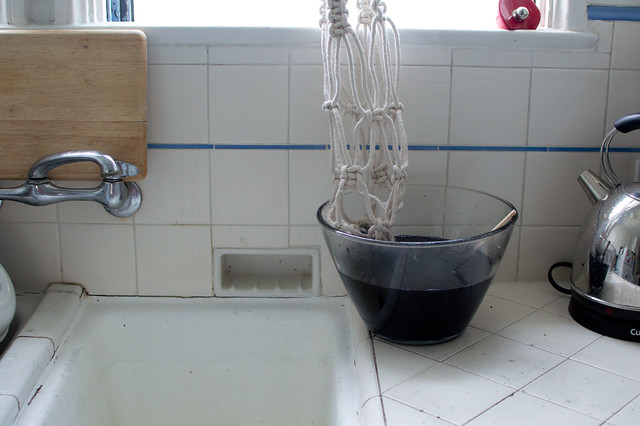
To dip dye it I just used Rit dye in navy and set it up so that I could slowly submerge it at 20 minute intervals. I wanted a soft fade into white so I diluted the dye a bit more before dipping the last section.

dyeing
{dyeing}

Washing it all out in the sink was a huge pain and it came out a little less vibrant than I intended but I'm happy with it.

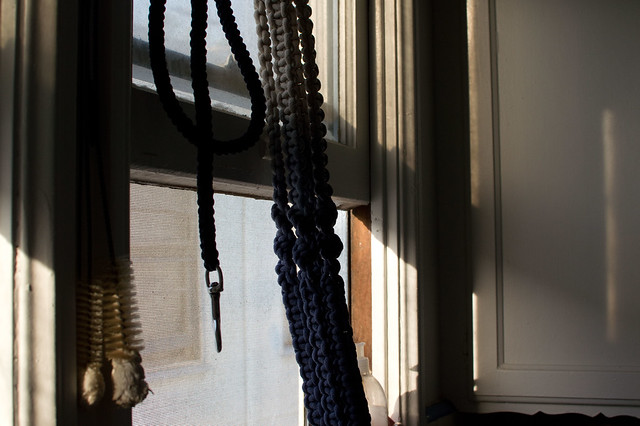
drying
{drying}

Finally getting it done was such a rush that I worked on two more (much simpler) versions using the thinner cotton cord this weekend and I have high hopes of getting them up in a more reasonable time frame.

Tuesday, April 15, 2014

CABINETS!

As you probably know from my incessant whining over the last three months, we moved to a smaller place in December and it was immediately obvious that our (not so insubstantial) cooking/baking supplies weren't going to fit in the new kitchen.

Luckily, D was willing to tackle the challenge. We added shelves first (p.s. - had our first decent earthquake a few weeks ago and everything was fine! but I'm still planning on putting in bars or something). The next project was a wall of counter height cabinets that would provide us with storage space and also give us enough counter room for more than one person to be in the kitchen at once.

We couldn't buy cabinets because the space was narrower than a standard cabinet depth. Otherwise we would have farmed this out to Ikea for sure.

Here is the progress over the last couple months ...

west wall
{west wall}

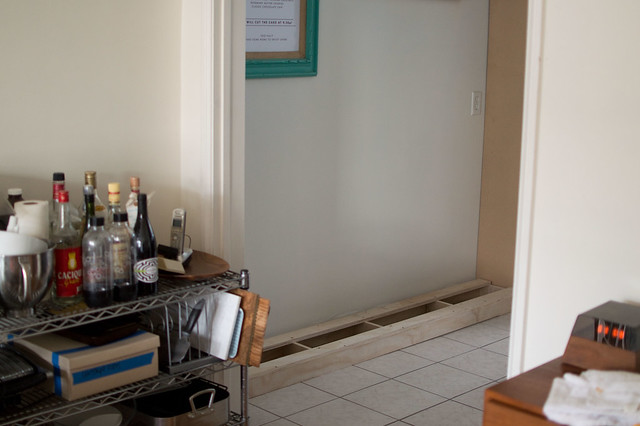
I don't have a picture of the space empty because moving was a blur. But this is what that wall looked like right after we moved in. We temporarily stacked a shelving unit and a bench there.

pre-cabinets
{pre-cabinets}

D built a false wall to temporarily* cover up the built in ironing board cupboard (I know, I know. In theory, it's a charming feature. In reality, it hadn't been cleaned since 1935 and I wanted the cabinets more) and put in the base.

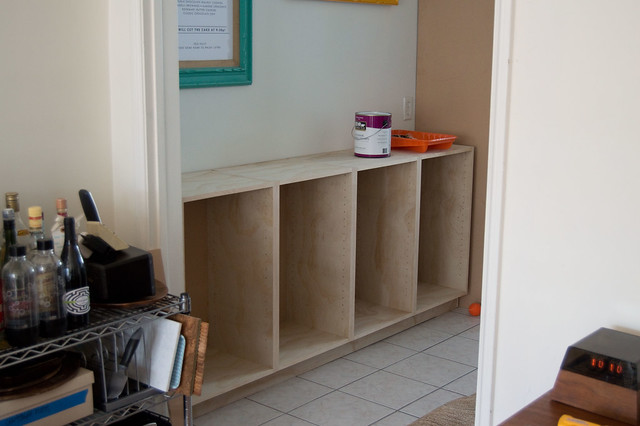
cabinets
{cabinet boxes}

After building the cabinet boxes and squaring them up, he put them in place.

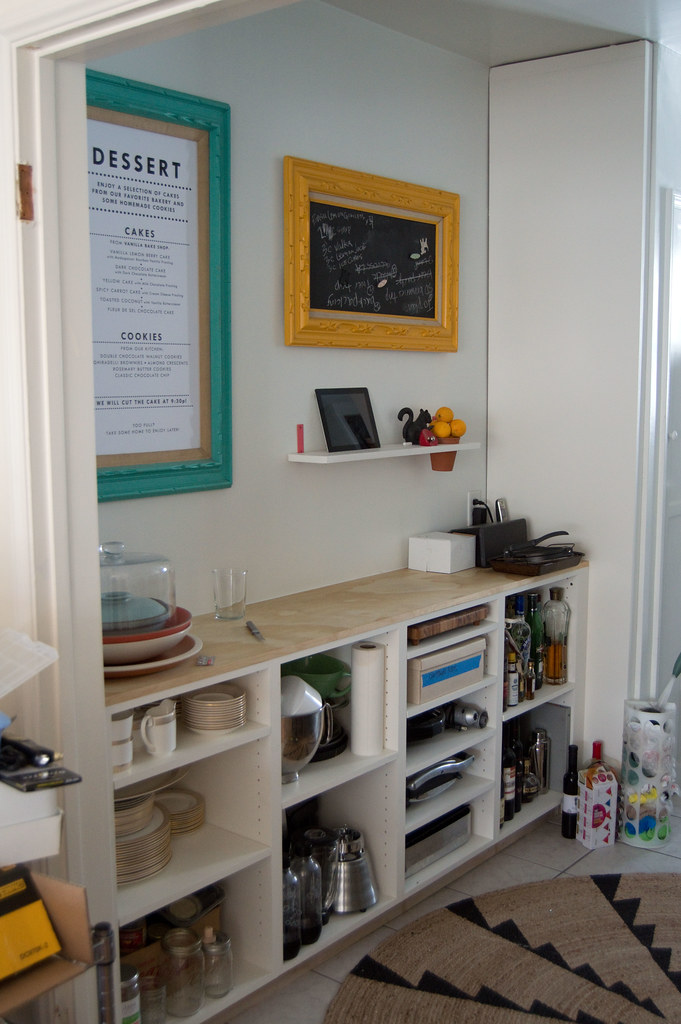
cabinets!
{cabinets!}

We painted everything the closest match to our kitchen white we could find, including the false wall.

fully installed
{fully installed}

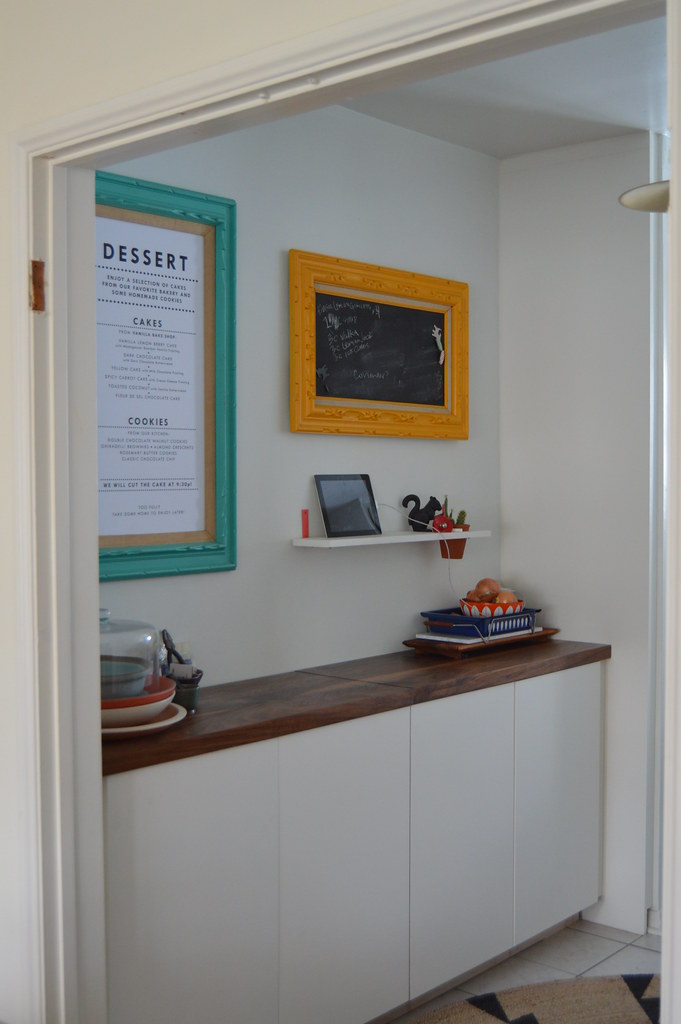
And then we added the cabinet doors and D built the most beautiful walnut top for it, to match our floating credenza.

finished
{finished!}

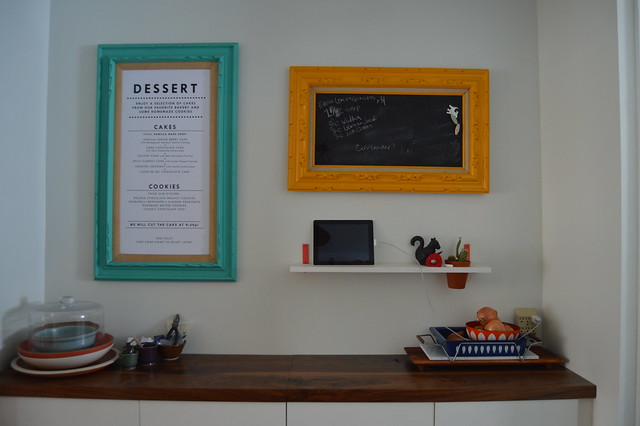
In the area above we hung the old chalkboard and the dessert frame from our wedding. It's the only wedding related decor we let ourselves keep and we're planning to repurpose it at some point (photo collage? another chalkboard?) but for now we hung it as is.

We built a tiny shelf with a space for a plant, inspired by this post. D added a groove along the shelf so we could safely stash the iPad there, since it always lives in the kitchen.

The minute the cabinets were finished our apartment felt a million times more functional. Having the extra counter space means both of us can cook at the same time and our kitchen stuff finally has a place to live. I'm over the moon.


*Whenever I share projects like this I get questions about installing stuff in a rental. All I can say is, no, we usually don't ask for permission first and no, we've never lost a security deposit. I take the risk on it because the additions make our apartment so much more livable. We're always careful to remove anything we've added and then patch and paint properly when we move out, although it certainly makes the moving process more intense. We're pretty considerate in general and I think the bar is pretty low - our landlords always seem relieved if there aren't gaping holes in the walls and broken windows. Your mileage may vary.


Thursday, March 27, 2014

Alllllmost done ...

It actually wasn't all that time consuming except for the fact that I ripped it out and redid it. And then I redid the basket weave at the bottom about 10 times because I was short on cord and desperately trying to make it work.

knots
{knots}

I just have a few finishing touches and then we'll get planting.

experiments
{experiments}

Which is it's own story, really.

I have an aversion to house plants. There, I said it. They remind me of everyone's houses in the '80s and I feel like people with houseplants are always worrying about strange sounding diseases and dusting them. Dusting living things! It just seems so strange, and like more upkeep than I can sign on for. I valiantly attempted to keep my balcony herb garden alive at our previous place because it was functional and I dislike paying for herbs. I gave in when D brought home mounds of rescued jade plant and spent a weekend potting it all up, because he swore I wouldn't have to do anything with it. I liked our green space although I generally let everything die during the winter.

And then we moved to an apartment with not a single scrap of outdoor space. We tossed the herbs and rehomed the jade and within a month Dustin started trying to get me to agree to indoor plants. I reluctantly agreed and then I decided that if a corner of our apartment was going to look like my childhood I might as well go the whole way and learn to macrame. Logical, right?

To be honest, the decision may have had less to do with aesthetics and more to do with the fact that I haven't picked up a new craft in a long time and I miss the feeling of it. It felt good. More details once I actually get it planted and hung.

Thursday, January 16, 2014

Baby steps

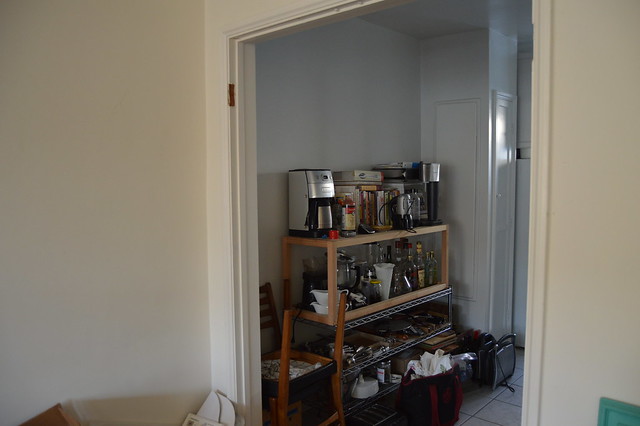
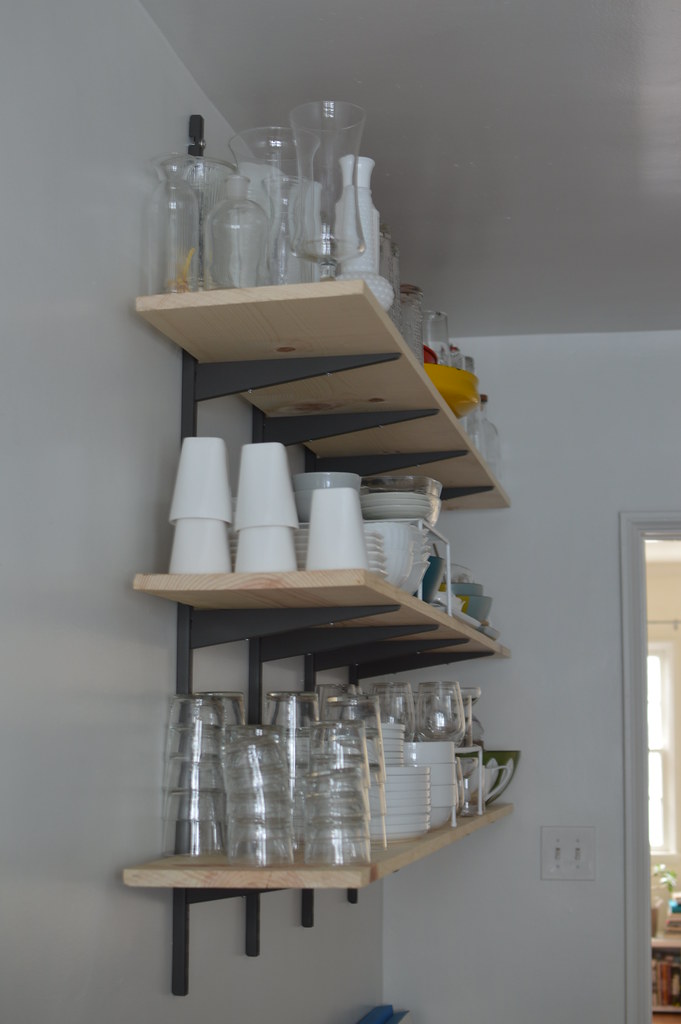
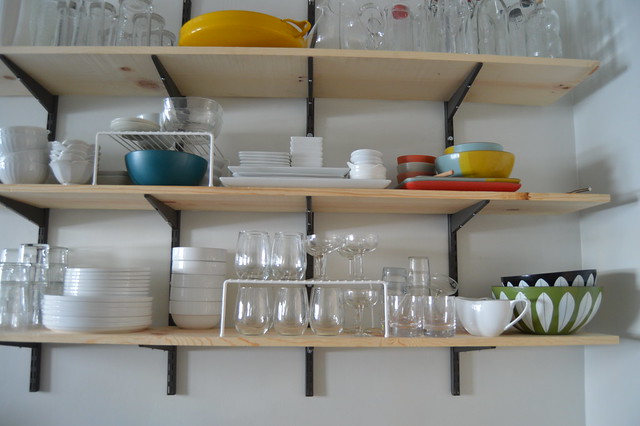
Actually, that's unfair. These shelves are the first thing we got done in our new apartment and they were a HUGE step. Our kitchen is adorable but not terribly functional due to a severe lack of cabinet and counter space. The area right next to the kitchen is meant to be a dining room but it's too small for our table so we're going to use it for extra storage and work space instead (we haven't figured out how we'll have people over for dinner yet, but we're working on it).

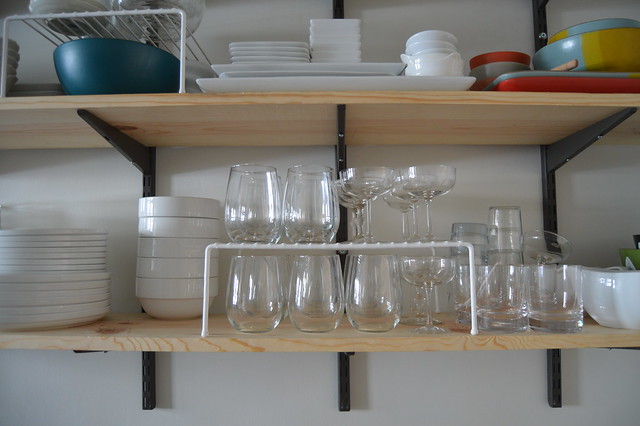
We already had the adjustable shelving system so we repurposed it. We painted it a dark gray (still a little torn on whether we picked the right color) because the glossy white wasn't going to blend into the wall anyways and we decided we'd rather have something that obviously stands out instead of a failed camouflage situation. We just used six foot boards as the shelves. I thought I'd be able to put out all my glassware, dishes, servingware and vases and then use one shelf for my cookbooks. Clearly, I'm terrible at estimating how much space things will take up and I have a lot of dishes. The cookbooks remain an issue.

shelves up
{shelves up}

new shelves
{new shelves}

glass display
{glass display}

Our plan is to eventually paint the shelves white to match the wall and put in nicer brackets so they're just floating and don't have the rails. But for now, this is a game changer. I'm using the limited cabinet space the kitchen came with to store our actual food and our mixing bowls, salad spinner, etc.

I was worried about open shelving when we live in an earthquake zone but after many, many internet searches for not-too-ugly solutions I decided we'd just take the risk. The main thing everyone points out is that in a major earthquake your cabinet doors are basically pointless anyways, unless you have those terribly annoying earthquake locks installed. But you'll notice I didn't put our wedding china up there.

I'll probably get a few more of the stacking shelves I'm using for the glasses. They aren't the most beautiful solution but it doubles the storage space and I like the multi-layer look.

We're also putting in a small shelf to stack our large pots on and we'll hang our pans right under it. That will go in the tiny kitchen area, right next to the stove.

We have a plan for the other wall of our "dining room" space and I'm hoping we get it put together in the next few weeks. I am SO DONE with the stacks of appliances and that consarned jug of molasses that doesn't fit anywhere else in the entire kitchen.

Thursday, January 9, 2014

Constellation pillows

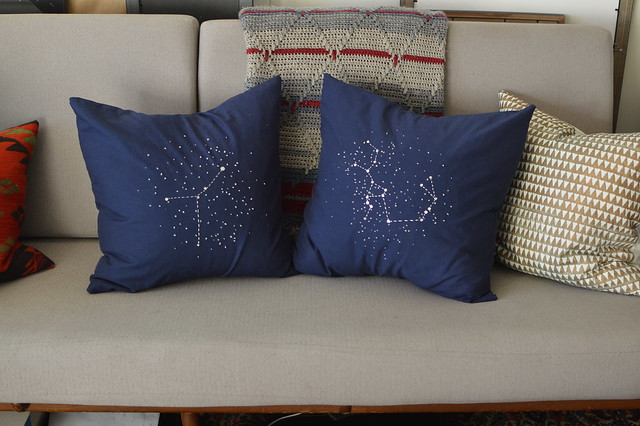
I had the idea for these back in October, which is the only reason I managed to finish them by Christmas.

constellation pillows
{constellation pillows}

I had marked this embroidered table runner tutorial a while ago and thought it would be perfect for my stepmom, who loves the stars. I ended up doing pillows instead, because they seemed more useful for everyday.

I mostly followed the tutorial instructions, which didn't require much embroidery skill once I retaught myself to tie a french knot. I picked up a remnant of navy blue cotton (these would be beyond good in a dark blue linen, but I didn't have time to search it out), a couple skeins of silvery grey embroidery floss and two 20x20" pillow inserts from Ikea (do not get their poly fill pillow inserts because they are terribly depressing - the down inserts are great and inexpensive). I used silver sequins for the stars in the actual constellation and scattered in a few silver beads as well.

I didn't use the actual template from the tutorial because I specifically wanted Sagittarius and Cancer only. I wasn't expecting it to be so difficult to find a definitive image of the constellations! They vary a lot. I ended up using images from this site because it seemed a little more authoritative than the others and the images were nice and clear. To make it easy to print, I opened each image in Illustrator, locked the layer and then added dots wherever the stars were and lines as indicated. Then I deleted the image, which left me with just the black dots and lines. I traced it on the fabric as indicated in the tutorial (using chalk sheets, which I'd never used before - they're handy!).

After I finished embroidering the pillow fronts I made simple envelope pillow cases using this tutorial. I have a zipper foot packed up in my stuff but this was easier than trying to find it. I should probably have added a little button on the back but I didn't.

Sorry - no close ups! I was taking these pictures super last minute before stuffing the pillows in a giant gift bag.

I'm happy with how they turned out and it was a fairly simple project. And now I want to get much, much better at embroidery. I'm thinking needlepoint portraits for next year? I better get started now.

Tuesday, December 3, 2013

You can't take it with you (or at least not all of it)

I would like to say that I'm above material concerns but I have to tell you that downsizing has been giving me some major headaches. Our new place is smaller, for reasons that I'll explain when I have more time, but basically, $$ + location - actually, that explains it fairly well.

I have to convince myself to give up some things and while the excess furniture is heading straight to Craigslist and the more random bits and pieces are going to the thrift store, there are some things that give me bigger pangs.

dyed napkins
{dyed napkins}

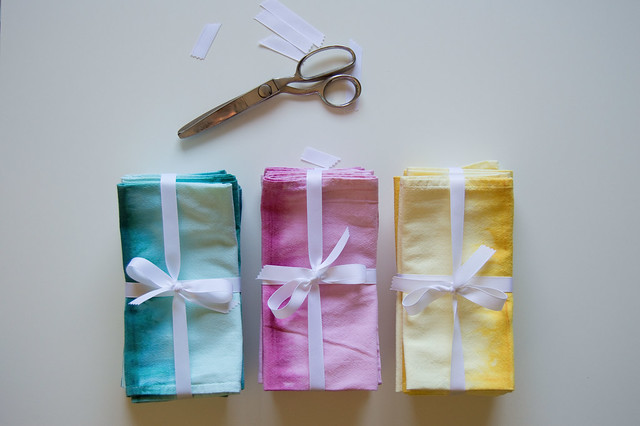
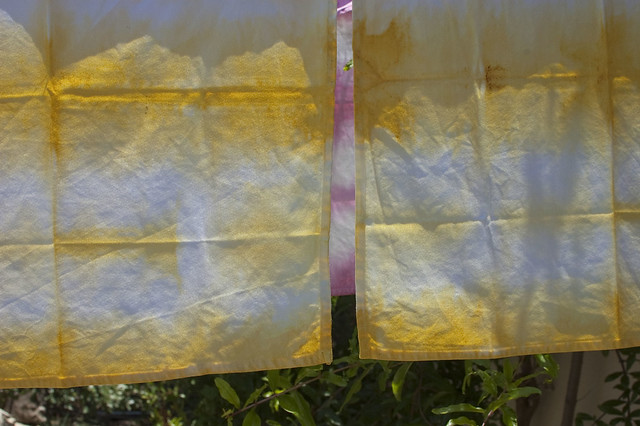
I've been hoarding our wedding napkins because I can't quite bear to give them up. Not so much because they are from our wedding but because they are really nice cotton napkins and they're pretty and we hand dyed those suckers and what if I needed to throw a really, really big party? Yes, that means I have had over 100 lovingly washed and pressed napkins in my closet for the last two years. Several dozen have made it into circulation in our house, but try as I might, I can't justify holding onto the rest of them anymore.

pink napkin
{pink napkin pocket folded - photo from our wonderful wedding photog, melissa of happy confetti}

UPDATE - All the napkins are sold, thanks guys! So if you happen to be in the napkin market, I'm letting these go. I'm selling them in sets of four (choose between blue sorry, all gone!, pink or yellow sorry, all gone!) for $20, domestic shipping* is included. These are not fine linen napkins! They are heavy duty, thick cotton that absorbs really well and will hold up over time, even with daily use. No two napkins are exactly the same, since we hand dyed them. You can see the tutorial on how we made them along with some pictures of them in action right here, if you're curious.

wedding napkins
{wedding napkins}

Because they are dyed in a stripey pattern, they will look completely different if you fold them differently. You can play around with them to see where you like the stripes.

napkins hanging
{napkins hanging}

Nothing fussy as far as care instructions go. I just wash ours with the rest of our laundry, which means warm water and tumble dry on high. I don't like to iron everyday napkins so I give them a good snap to shake them out as I transfer them from the laundry to the dryer and then fold them while they're still hot to minimize wrinkling. I'll tuck a little card with care instructions in each set, in case you'd like to give them as gifts.

If you're interested, send me an email at rachel.heartoflight@gmail.com and let me know what color you'd like so I can set it up. I have these all wrapped up and tucked aside in their own box and I'll be keeping them close and shipping them out as I get requests, so they'll arrive quickly. I just want them to go to good homes.

Let's not even talk about my cake stands. Or my enormous supply of stationary. Or the Gocco + assorted inks. I have decision fatigue.

* International readers, you know I love you! It's just that with the craziness of the move I don't have time to jump through the customs declaration hoops at the post office. I'm so sorry! If you'd really love a set and you're willing to wait another week, email me and we'll work something out.


Tuesday, October 1, 2013

And back in LA ...

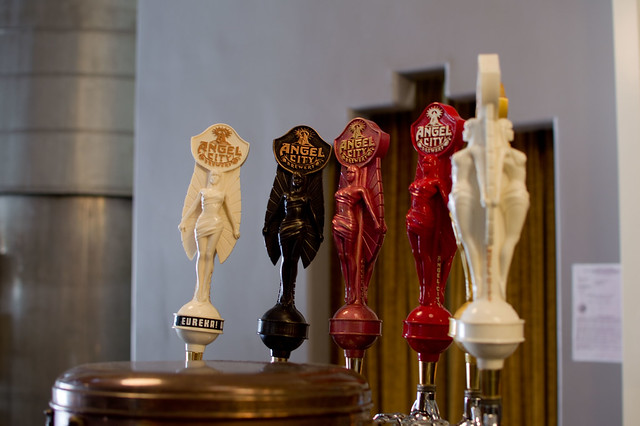
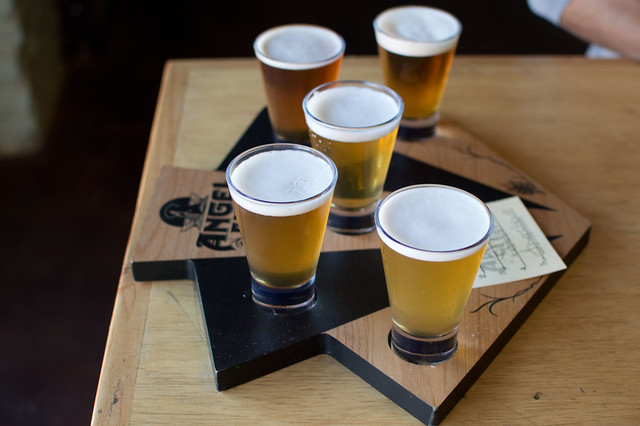
A couple Sundays ago we treated ourselves to a lighting workshop at Poketo, preceded by a shared flight at Angel City Brewery and a pocket pie from the Pie Hole. I'm sure that drinking before working with electricity is not strictly recommended, but we were technically still on vacation that day.

angel city taps
{angel city taps}

flight
{flight}

strategizing
{strategizing}

lighting workshop at poketo
{lighting workshop at poketo}

I've always shied away from working with electricity, so it was fun to get some experience with it in a setting where I was fairly certain I wouldn't be allowed to electrocute myself. We wired a simple pendant lamp and we're going to use them as our new bedside lamps. Pictures to follow, hopefully. You would think it wouldn't take us two weeks to get a couple of lamps hung, but you'd be wrong.
Friday, September 20, 2013

Update - homemade cleaners

I frequently forget to follow up on how new things are going, because telling you that I'm still doing something is not nearly as interesting as just posting about something new.

BUT ... 

I'm still on board with the homemade kitchen cleaner and it's very easy. 

lemon cleaner
{lemon cleaner}

I'm mostly sticking with the lemon + basil variation. I've gotten in the habit of saving lemon peels, cleaning off the fruit right away and keeping them in a bag in the fridge. The higher your ratio of peels to vinegar, the better your cleaner will smell, unsurprisingly. I chop the peels up a bit before I pack them in a jar to maximize the contact. 

You can re-use the peels at least once. After a couple weeks, I'll pour off the steeped vinegar into my spray bottle and then just top off the peels with fresh vinegar and let it sit for another few weeks. Works great. I always have two jars going now.

Wednesday, September 18, 2013

How to decorate a baby shower for $20 ...

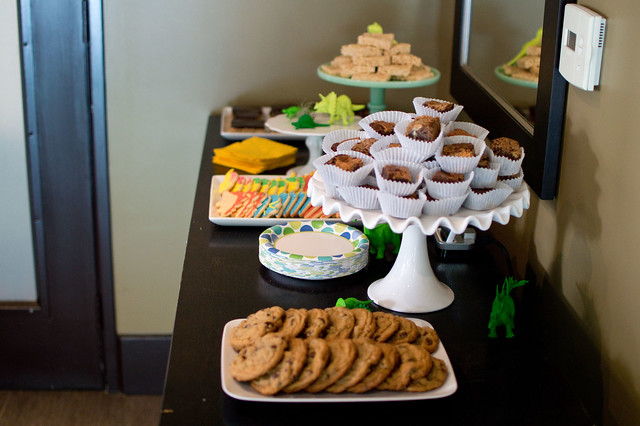
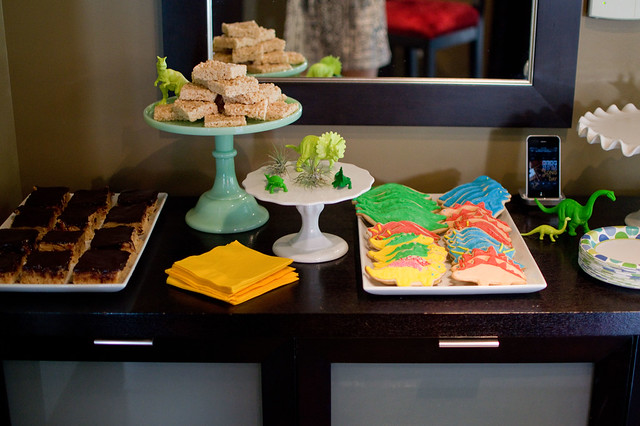
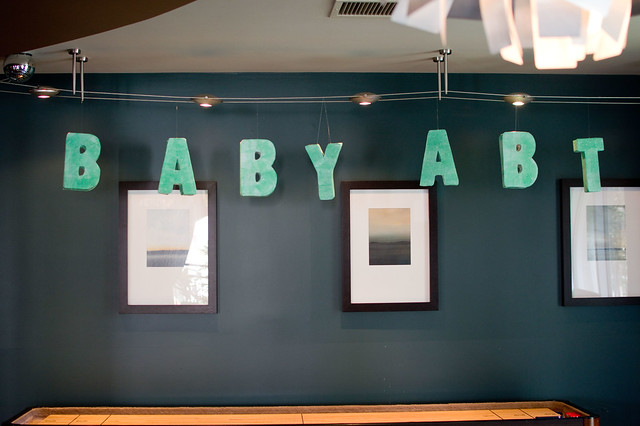
spray paint, 10 balloons, a handful of dinosaurs and tapping into those kindergarten paper mâché skills. Done.

dessert table
{dessert table}

dino dessert!
{dino dessert!}

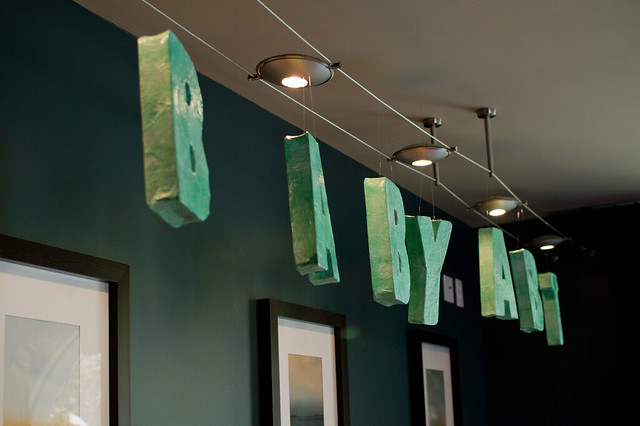
letters, deployed
{letters, deployed}

baby shower
{baby shower}

Okay, so this was not the most elaborately decorated Pinterest-y baby shower ever, but it was one of the most fun, laid back baby showers I've ever been to (co-ed party with pizza and pasta, minimum of fuss, and no one asked me to taste any baby food). Our friends wanted it simple but I begged for permission for a few (very minimal) decorations just to make it festive. The mom to be is one of the thriftiest ladies I know, so in that spirit I tried to keep the cost low and not go overboard.

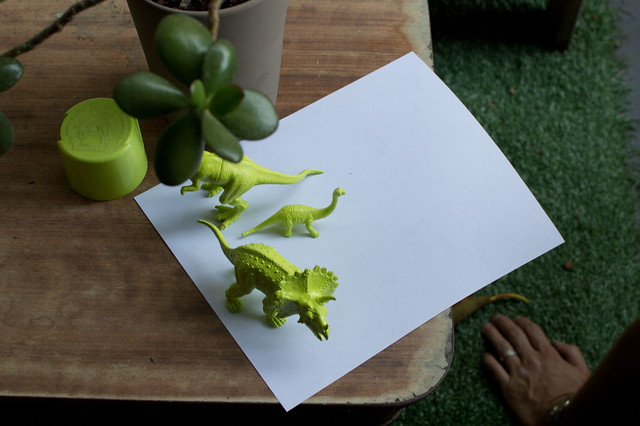
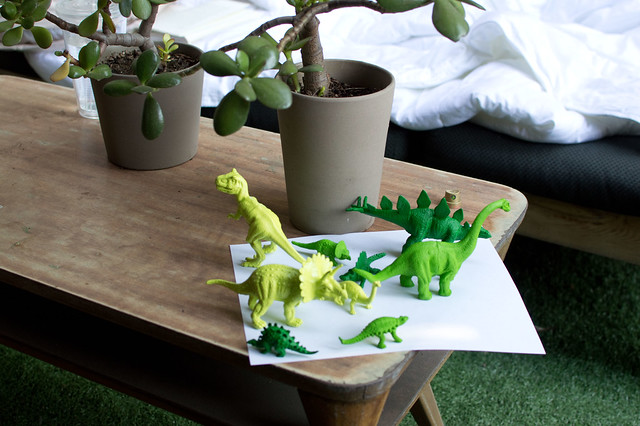
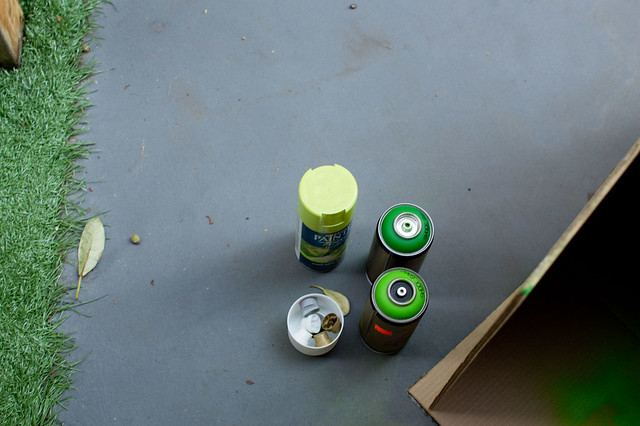
I spent $10 on dinosaurs. The little ones came from Party City but I had to track down the larger ones at the dollar store. I have a shoebox full of spray paint, so I didn't have to purchase any. I primed them before painting them a couple different shades of green (Montana has the best spray paint colors).

stegosaurus
{stegosaurus}

the herd
{the herd}

greens
{greens}

$8 on balloons - they really do help let people know where the party is happening, so they're not just decorative.

$2 on dessert plates that matched the general color scheme.

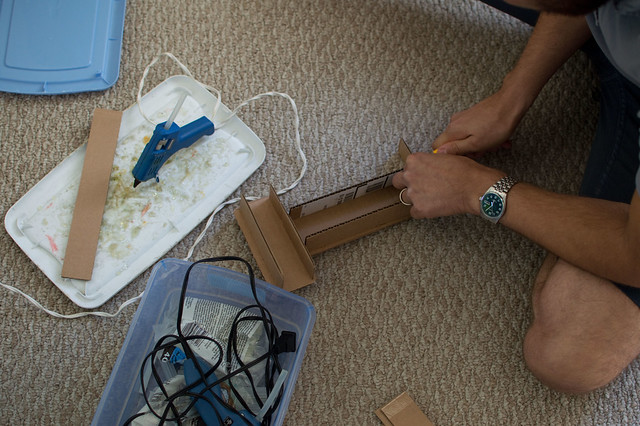
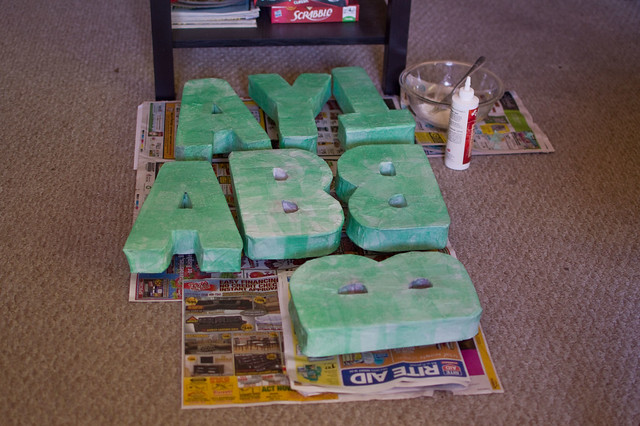
The letters were a collaborative labor of love and halfway through I decided we were totally insane but persevered because I still can't come to terms with sunk costs. And I do love how they turned out. D printed out large letters on paper and used them as templates to cut out our letters (twice as many as we needed, so we'd have front and back). Then he made them three dimensional by sandwiching cardboard spacers between the front and the back. THEN I started the painstaking process of dipping colored tissue paper in watered down glue and draping it over the forms. I think I ended up having to do 5 - 6 layers (and let it dry completely between each) and it was layers 3 - 6 that had me really questioning our sanity. Unless you have hours of spare time (the commodity we were lacking), I'd recommend purchasing letters like these and maybe just spray painting them. I am SO GRATEFUL that we decided not to try to add "welcome" like we originally intended.

letter crafting
{letter crafting}

paper mache in progress
{paper mâché in progress}

Emily very kindly stepped in to help tutor me on the sugar cookies, because the last time I attempted decorating with royal frosting turned out so badly (although delicious-ly) that I never shared them here. Partially because I was embarrassed by my lack of skills and partially because they were for a bachelorette party and therefore mildly inappropriate. My current favorite sugar cookie recipe is this one, because it has cream cheese in it and is most similar to the one we used growing up.

sugar cookies
{sugar cookies}

Our friends picked up catering, a few of us brought desserts (those chocolate and peanut butter rice krispy treats were so amazing that I'm still thinking about them) and there were plenty of drinks. Everyone hung out and talked for hours. The perfect way to celebrate the imminent arrival of a new addition.

I wish I'd had a tiny bit of extra time because I'd have added cute kids books and very simple, small flower arrangements to scatter around. But, you know, life happens. And we all survived.