
Christmas Day was a blur of driving and family and then we had a whole freaking week when we were both on vacation and at home, which never, ever happens to us. We made this huge list of things we wanted to do and then instead of doing most of them we took turns catching colds and ended up binge watching a bunch of TV and using the fireplace as much as humanly possible. It was still pretty wonderful.
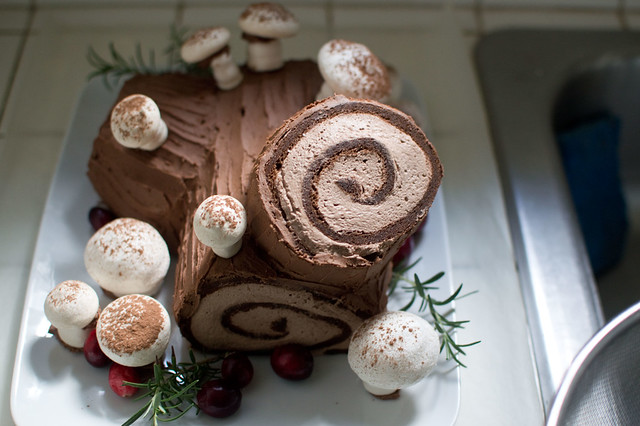
Bûche de Noël (aka yule log) - I think this is going to become a tradition, so I promised myself I'd write down some notes for when I inevitably forget everything next year.
We used this recipe for the sponge cake + filling. Super simple, tasty. I didn't have any trouble with it except that the recipe specifically calls for a 10x15" jelly roll pan and I only have my beloved half sheet pans (closer to 12x17" if you're looking at the interior measurements) and a couple quarter sheet pans (9x12") from when I had a miniature oven. I stressed about whether I should try to scale the recipe up a bit, but decided against it and as it turns out I think the half sheet pan is exactly what you need. It filled the entire pan perfectly.
Notes -
- Beat the egg yolks thoroughly (3 - 5 minutes in a Kitchenaid). They should be very thick.
- Put parchment paper in your sheet pan and then spray it with oil. I had no issues peeling the parchment off, but some of the reviews mention that if you don't spray with oil it can suck trying to get the paper off.
- The filling is just whipped cream with cocoa powder, and I was afraid it would collapse quickly, but it held up pretty well. I made this the same day we ate it, but the leftovers were good for another couple days, so it would be possible to make it a full day ahead, possibly two (do NOT put meringue mushrooms on until the day you are serving it, though).
Mushrooms - I used this recipe for meringue mushrooms. I used superfine sugar instead of regular granulated because I always do for meringue (I don't buy superfine sugar, just blitz regular granulated sugar in the food processor). Some reviews mentioned the meringue being too salty, and I did notice that I could taste salt, but I actually liked it and no one else commented on it. Maybe reduce the salt a bit at first and taste before adding more? I didn't have a large enough circle tip, so I just cut the tip off the pastry bag. I didn't assemble the mushrooms with melted chocolate as the recipe called for because I was feeling lazy so I just stuck the tops and bottoms together with buttercream. I had watched Emily make the mushrooms last year, so I winged the technique but if you want to see someone do it this looks like a very detailed tutorial, although the video is crazy long (tip - she starts piping around 12 minutes if you need to jump ahead). Meringue will get sticky if it's damp out, so if you're making these ahead of time store them in an airtight bag. I found that mine were fine sitting on the cake for 12 hours, but by the 24 hour mark they were starting to get sticky. The ones in the bag held up perfectly for 3 days (probably would have lasted longer except I ate them all by then).
Chocolate buttercream - I used this recipe for chocolate buttercream and it was tasty but sweeeeeeeeet. I might try something less sweet next year (I usually prefer flour or pudding based buttercreams - Bravetart has my favorite buttercream recipes and tips and I particularly love her German buttercream although I'm not 100% sure it is sturdy enough for this purpose - maybe a ganache frosting of some sort?). But everyone else loved the sweet buttercream so maybe I'll just stick with it because it was super easy. One important note - this recipe makes at least 3 times as much frosting as you could possibly need, even if you are frosting heavily (which you don't really need to do with a yule log). I'd at least cut it by half, possibly by a third.
Making the branches - The recipe I used doesn't explain how to make the branches. I know last year we found a description somewhere but I can't find it now. Basically, I fill the yule log exactly as described in the cake recipe. At this point, I roll it up tightly in a kitchen towel and place it in the fridge, ideally for an hour or two. Then I remove the dish towel, place the cake on a cutting board and cut a slice off each end with a sharp knife (just enough to clean up the edges). To create branches, I then cut off a larger piece from one end (maybe 5" or so?). I cut this piece in half at an angle, creating two pieces that each have one straight side and one angled side. Transfer your log to a serving plate, then add the branches.Using frosting, adhere the angled side to your log wherever you want it. I put one branch coming off the side and one coming off the top, but you can have just one branch or no branches at all, of course.
Frosting - Once your branches are in place, carefully spread buttercream over the entire cake (leaving the ends exposed if you like). I used a small offset spatula with a tapered head for this (mine is like this one), and then just dragged the tip of the spatula in brush like strokes to create texture. You can also create a bark-like texture using the tines of a fork.
Decorating - for finishing touches add the meringue mushrooms on both the cake and the plate using buttercream to stick them in place (again - I'd wait to put the mushrooms on until the day you are serving the cake, if you made it ahead). This year I added sprigs of rosemary from the garden, and a few cranberries for color and then dusted the whole thing with powdered sugar (place powdered sugar in a sifter or fine strainer, then gently tap over the cake).
IDEAS FOR NEXT YEAR: I like having the two branches, but this makes a somewhat stumpy cake (ha). Next year if we want to get ambitious I think it would be fun to work together and make three batches of the cake + filling. This would allow us to get two full length yule logs and use the third cake solely for branches. If you're making more than one cake, you still just need one batch of mushrooms (could probably decorate 3 - 4 cakes with one batch). The frosting recipe I used this year could be cut in half and still frost two cakes easily, I think.
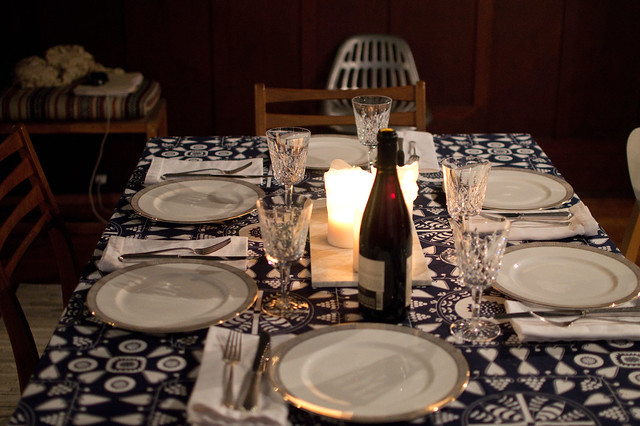
That yule log is amazing! I love the idea of making Christmas Eve dinner the day before - my husband always makes lobster mac 'n cheese, which is wonderful, but it does take some time. Then again, it's the one night a year that he cooks for me, so I think we'll keep that tradition going. ;-)
ReplyDeleteLooks lovely!
ReplyDeleteI've made this recipe https://food52.com/recipes/25378-buche-de-noel-yule-log the last two years with fairly good results. The filling is a pain with the mascarpone curdling, but the flavor is amazing with the vanilla bean and coffee (and I add Kahlua). I think next year I'll just do a whipped cream filling since you say it holds up, but add the flavors of chocolate, coffee, and kahlua or some other liquor. Also, the ganache for the outside makes the cake look much more "grown up", which is fun (and is easier than buttercream in my opinion!)
ReplyDeleteI saw that one and was curious about it! Nice to hear a review! It looks delicious.
DeleteYour yule log is so stinking' CUTE!
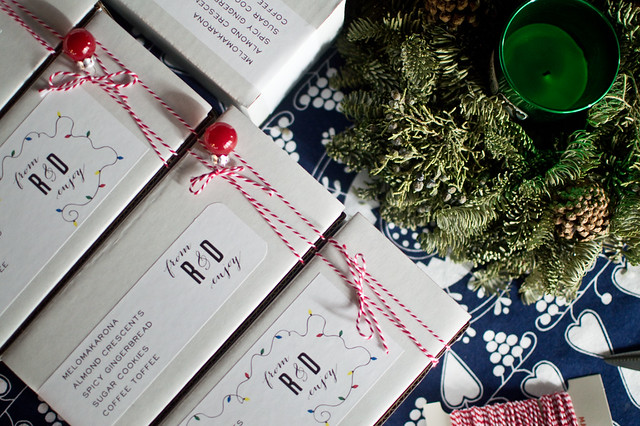
ReplyDeleteI love your cookie packaging. I noticed "coffee toffee" and was wondering if you would share the recipe...it sounds delicious!
ReplyDeleteThank you! I used the Smitten Kitchen coffee toffee recipe and it's delicious, but I have to warn you that my first batch this year was a big failure (and of course, I'd made a double batch, so it was a HUGE waste of ingredients). I've made it in the past and it worked fine so I was completely bewildered when it failed this year.
DeleteIf you haven't made toffee before, I definitely recommend making a single batch to test it out first, given my experience this year. I was very careful about letting my thermometer get to exactly the right temp, but my toffee set up grainy and soft instead of glassy. At first I thought maybe my thermometer was off, but I double checked it in boiling water and nope, it's accurate. On the second try, I used the thermometer but also carefully watched the texture for changes AND did a traditional test by dropping a few drops in cold water to make sure it was setting up glassy before I pulled it off the heat. I found that I had to cook a bit above 300 degrees to get to the right point. The texture in the pan really changes and it's less bubbly and more smooth (hard to describe until you see it, sorry!) and I noticed that the edges were juuuuust starting to burn a bit (but I was whisking constantly and there was no burned flavor in the final product). I think my thermometer was reading closer to 310 degrees at that point. I'm not a candy making expert so I'm not sure if the temp you need varies based on humidity or something else.
Once that batch worked, I did the next batch by eye, just watching for the right texture and not even bothering with the thermometer. It came out perfectly so I think that's what I'll do from now on. Once you know what it should look like, I think it's a better guide than the temp (and it's so much easier to whisk without having to worry about the thermometer).
Sorry for the super long winded response to a quick question! But I can confirm the recipe is delicious once you master it.
Hey, I'm Sally! Anyway, THANK YOU for the buche post - I'd been dying about it ever since seeing it on Instagram.
ReplyDeleteWHERE did you get those cute stickers? I made a TON of food gifts for people, and the handwriting of each kind of treat was a bummer. THANKS!
Hi, Sally! I designed the sticker labels myself (I used Adobe Illustrator, but the design was pretty simple and it would probably be easy to do something similar in PowerPoint, if you don't use AI) and printed them out on full sheet labels, then cut them out. It was the first year I've done sticker labels and I think I'll always do them! So super easy and made everything look really polished. I got these full label sheets although I'm sure they're more or less the same no matter what type you use. I always get my boxes at PaperMart (white tuck top boxes in various sizes) and I love them because they're nice and sturdy. You do have to buy a ton, so I only order once every five years or so.
DeleteThe only issue with the labels is that you're committed to actually producing those items! My first batch of toffee was a dismal failure this year and I probably would have just ditched it normally but instead I ended up running out to the store to get more butter, rather than re-design and re-print the labels. Ha!
Rachel, thanks so much for the reply! I bought small gold labels from PaperSource for our names, but would have loved bigger ones for the names of the treats. I'm not skilled in either program (what can I say, I talk and do research) but maybe a friend can help with the labels... Your buche is awesome - I made Dorie Greenspan's Gingerbread buche and was happy with it for my first one, but wasn't blown away by the flavor... Thanks again!
DeleteIf you don't want to design the labels on a computer, you might be able to handwrite/draw your own on a single sheet of paper, then use a copier to copy it onto the full sheet labels. I haven't tried that, but it should work! And could be a fun way to have "handwritten" labels without the hassle of actually writing every single one. I'd be more tempted to try it myself if my handwriting was better or if I was remotely capable of sketching! My design skills are entirely limited to the computer, sadly.
DeleteRe: the cake flavor - the recipe I used is super simple. We all thought it was really tasty, but I wouldn't call it particularly special (when compared with a regular layer cake, for example, where I have much higher flavor expectations!). It's the only one I've tried so I'm not sure how it stacks up against others, but I wouldn't want you to be disappointed if you're expecting something spectacular! The cake itself is very light (and gluten free) but I like the texture and flavor. However, it's mostly about how cute it looks. : )
I love the buche! And your boxes of goodies are adorable.
ReplyDeleteI ended up sending a twig star made from aspen sticks from our cabin up north using these boxes from amazon, some twine, and a sheet of bubble wrap each (it ends up being about 60 cents a package for the box and bubble wrap). For US shipping, each box was $2.70, and international ended up being between $6 and $15, depending on the location. They are very light, but easy to put together and seem pretty strong once they're folded up.
Gah, my comment disappeared! I did a ganache frosting on my layer cake bûche, which I liked. I can't handle the sweetness of most buttercreams. I think I'm going to try the traditional jelly roll version next Christmas, I think.
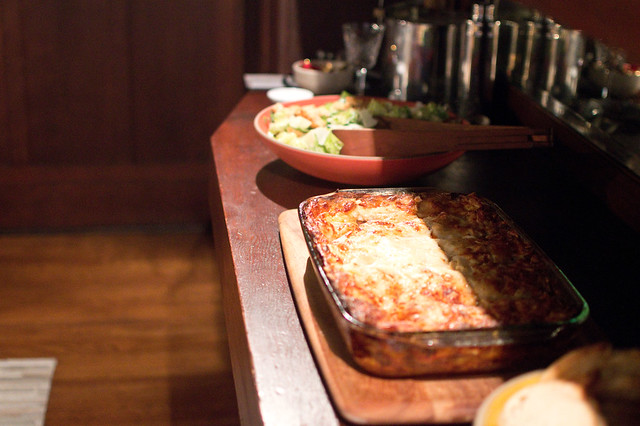
ReplyDeleteAlso, I have to try this lasagna recipe. I haven't made lasagna in ages.