
First of all, yes, that recipe has 24 steps, which is a little terrifying when you print it out. Never fear, it's actually very, very easy and you can modify it if you need to. I don't make enough bread anymore to justify keeping several different types of flour on hand so I just use bread flour. I also give it an (at least) overnight rise in the fridge because that's more convenient for my schedule, given that I'm rarely at home all day. I find it tastes best after at least 24 hours and the time I left it three days was particularly good.
I've been playing around with it for over a year, and I'm finally ready to transfer my notes from the scribbles all over the recipe printout I've been using. If you want to try it as written, please go to the original recipe. I think it's well worth reading.
How many pizzas does it make? If you like a very thin crust pizza, make six portions, as recommended in the original recipe. If you like a very thick crust, make three. Four is the sweet spot for me. Regardless, the finished pizzas will be about 12" across.
We don't generally eat four pizzas at once, but I'll make a full batch of dough anyways. There are a couple options here and both of them are good. To make my own frozen pizza I parbake the crusts until they are just barely golden in patches on the bottom, pull them out and let them cool. Once they're room temp, I'll dress them, place them on a cookie sheet and freeze them, toppings and all. After they fully freeze I wrap them in saran and then foil and store them so we have our own frozen pizzas. Does this save you money? Probably, although frozen pizzas aren't very expensive. It definitely does not save time. I can't justify it very well except to tell you that it's incredibly satisfying to have homemade pizza even though you had a long day and got home at 9 pm.
If you don't want to go the whole way, you can also just pop the extra dough balls into ziploc bags and then freeze them. Pull them out the day before you want to use them and stick them in the fridge to defrost.
And here is my current version of this recipe. For more detailed instructions, which I'm sure will make it even more delicious, see the original.
Overnight pizza dough - bastardized from Nancy Silverton's recipe
Ingredients
22 oz warm tap water (2 cups, 6 oz)
1 heaping teaspoon active dry yeast
27 oz bread flour + a bit more flour for shaping
1 1/2 teaspoons mild-flavored honey
1 tablespoon kosher salt
Olive oil for greasing the bowl
Instructions
Make the sponge: put 15 oz of warm water and the yeast in the bowl of a standing mixer and let it sit for a few minutes to proof (make sure you get some bubbles so you know your yeast is working!). Add 14 oz of the bread flour and mix at low speed to combine. Cover the bowl tightly with plastic wrap and set aside at room temperature (ideally 68 - 70 F) for about 1 1/2 hours. In the winter I'll do this on the windowsill if there's sun, to help bring the warmth up. If you're heading out the door it's totally fine to leave your sponge to rise for a couple hours longer.
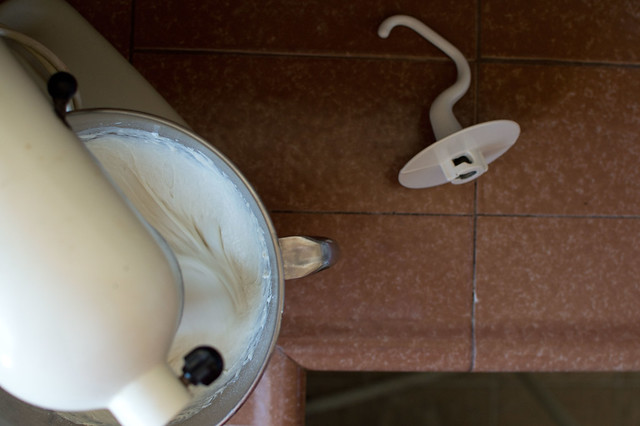
Uncover the bowl and add the remaining 7 oz of water, the remaining 13 oz of bread flour and the honey. Using a dough hook (if you don't have one, just use your regular mixer blade and scrape it more often) mix the dough on low speed for about 2 minutes. Add the salt and mix on medium speed for about 10 minutes, scraping as necessary to keep the dough from creeping up the hook. At this point, the dough should be starting to pull away from the sides of the bowl. It won't clean the bowl completely, but it will start to look more cohesive and it will sort of bundle up around the hook. If the dough is very sticky and wet you can toss in an extra handful of flour, but I've never found this to be necessary.
Turn the dough out of the mixer and into a lightly oiled bowl that has enough space for the dough to double in size. Cover with plastic wrap, set it aside at room temperature for 45 minutes.
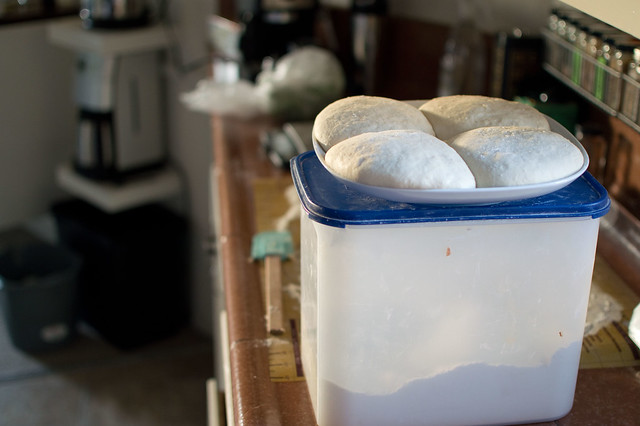
Dust your work surface lightly with flour and turn the dough out onto it. Acting as if the round has four sides, fold the edges of the dough toward the center to form a nice ball. Turn the dough over and return it, folded side down, to the bowl. Cover with plastic wrap again and set it aside for another 45 minutes. At this point, I go ahead and stick it in the refrigerator overnight or for a couple days.
When you're ready to make your pizza, dust a work surface generously with flour and turn the dough out onto it. Divide the dough into equal segments. I've found that you get somewhere between 42 and 48 ounces of dough. Nancy recommends dividing into six segments (~ 7 oz each) but I usually do four segments (~ 11 oz each). I find my kitchen scale really helpful here, but you can always eyeball it. Form into rounds, cover with the plastic wrap from the top of the bowl and let them rest for at least an hour. Don't shortcut this, particularly if you refrigerated the dough. It's much easier to work with once it's properly rested.
Place your pizza stones in then oven and turn it on as high as it will go (500 for mine). Leave them to heat while your dough rests.
Get all your toppings ready, then stretch out your pizza crusts. There are different methods for this (see Nancy's detailed description in the original recipe but you'll probably develop your own). Pick up a ball, (do not knead it!) flatten it a bit with your hand and then start stretching it out. I'm not coordinated enough to do any fancy pizza restaurant flips, but I do a modified version of that, resting the stretched circle of dough over the backs of my hands and then spinning it a bit. This video is almost exactly what I do, if you need a visual. I think the hand stretching works better than rolling with a pin, but it also runs the risk of ripping the dough. If you rip the dough you'll need to knead it back into a ball and then set it aside to rest again. I find dough that has just been kneaded is too springy to stretch out well. It will relax as it rests and it will be much easier to work with.
I do not fuss with a pizza peel but there are great instructions in the original recipe if you want to try it. When I'm ready, I just pull a pizza stone out of the oven, place the stretched dough on it as evenly as I can (you can also adjust a little right after you put it down), dress it with toppings and pop it back in the oven. It's not the pro way to do it, but I've never had success transferring a topped pizza to the stone in the oven.
Bake the pizza until crisp and golden brown. The time is completely dependent on your oven and how thick you rolled the dough. I always check starting at 8 minutes.
If you don't want to go the whole way, you can also just pop the extra dough balls into ziploc bags and then freeze them. Pull them out the day before you want to use them and stick them in the fridge to defrost.
And here is my current version of this recipe. For more detailed instructions, which I'm sure will make it even more delicious, see the original.
Overnight pizza dough - bastardized from Nancy Silverton's recipe
Ingredients
22 oz warm tap water (2 cups, 6 oz)
1 heaping teaspoon active dry yeast
27 oz bread flour + a bit more flour for shaping
1 1/2 teaspoons mild-flavored honey
1 tablespoon kosher salt
Olive oil for greasing the bowl
Instructions
Make the sponge: put 15 oz of warm water and the yeast in the bowl of a standing mixer and let it sit for a few minutes to proof (make sure you get some bubbles so you know your yeast is working!). Add 14 oz of the bread flour and mix at low speed to combine. Cover the bowl tightly with plastic wrap and set aside at room temperature (ideally 68 - 70 F) for about 1 1/2 hours. In the winter I'll do this on the windowsill if there's sun, to help bring the warmth up. If you're heading out the door it's totally fine to leave your sponge to rise for a couple hours longer.
Uncover the bowl and add the remaining 7 oz of water, the remaining 13 oz of bread flour and the honey. Using a dough hook (if you don't have one, just use your regular mixer blade and scrape it more often) mix the dough on low speed for about 2 minutes. Add the salt and mix on medium speed for about 10 minutes, scraping as necessary to keep the dough from creeping up the hook. At this point, the dough should be starting to pull away from the sides of the bowl. It won't clean the bowl completely, but it will start to look more cohesive and it will sort of bundle up around the hook. If the dough is very sticky and wet you can toss in an extra handful of flour, but I've never found this to be necessary.
Turn the dough out of the mixer and into a lightly oiled bowl that has enough space for the dough to double in size. Cover with plastic wrap, set it aside at room temperature for 45 minutes.
Dust your work surface lightly with flour and turn the dough out onto it. Acting as if the round has four sides, fold the edges of the dough toward the center to form a nice ball. Turn the dough over and return it, folded side down, to the bowl. Cover with plastic wrap again and set it aside for another 45 minutes. At this point, I go ahead and stick it in the refrigerator overnight or for a couple days.
When you're ready to make your pizza, dust a work surface generously with flour and turn the dough out onto it. Divide the dough into equal segments. I've found that you get somewhere between 42 and 48 ounces of dough. Nancy recommends dividing into six segments (~ 7 oz each) but I usually do four segments (~ 11 oz each). I find my kitchen scale really helpful here, but you can always eyeball it. Form into rounds, cover with the plastic wrap from the top of the bowl and let them rest for at least an hour. Don't shortcut this, particularly if you refrigerated the dough. It's much easier to work with once it's properly rested.
Place your pizza stones in then oven and turn it on as high as it will go (500 for mine). Leave them to heat while your dough rests.
Get all your toppings ready, then stretch out your pizza crusts. There are different methods for this (see Nancy's detailed description in the original recipe but you'll probably develop your own). Pick up a ball, (do not knead it!) flatten it a bit with your hand and then start stretching it out. I'm not coordinated enough to do any fancy pizza restaurant flips, but I do a modified version of that, resting the stretched circle of dough over the backs of my hands and then spinning it a bit. This video is almost exactly what I do, if you need a visual. I think the hand stretching works better than rolling with a pin, but it also runs the risk of ripping the dough. If you rip the dough you'll need to knead it back into a ball and then set it aside to rest again. I find dough that has just been kneaded is too springy to stretch out well. It will relax as it rests and it will be much easier to work with.
I do not fuss with a pizza peel but there are great instructions in the original recipe if you want to try it. When I'm ready, I just pull a pizza stone out of the oven, place the stretched dough on it as evenly as I can (you can also adjust a little right after you put it down), dress it with toppings and pop it back in the oven. It's not the pro way to do it, but I've never had success transferring a topped pizza to the stone in the oven.
Bake the pizza until crisp and golden brown. The time is completely dependent on your oven and how thick you rolled the dough. I always check starting at 8 minutes.
News That Is Very Interesting And Excellent Once for the review read . This article will be helpful and useful to readers Articles All Around the World . passion for writing review articles of interest
ReplyDelete