Friday, December 19, 2014

Homemade crackers

Possibly the most unnecessary holiday task to add to your list. Yet still kind of fun.

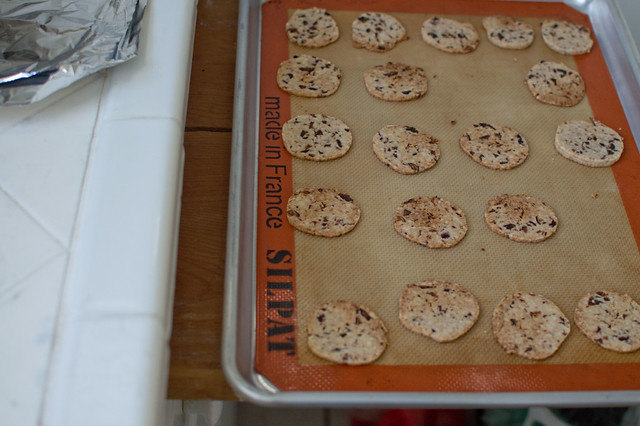
fig almond crackers
{fig almond crackers}

I made these for Friendsgiving and while it would have been much smarter not to give myself an extra task, I have to admit they were pretty delicious. And they actually held up well, so I could definitely have baked them a day or two ahead and stored them in a ziploc bag.

These crackers are easy (I think I put together the dough in less than 15 minutes) and they can be stored in the freezer and baked off as needed. I still have a half log that I'm looking forward to using and I'm even contemplating making another batch.

I've clearly been brainwashed by MSL.

Recipe is here - no need for edits. I used vermouth instead of port to avoid buying one more bottle of rarely used alcohol and it worked perfectly well. They are really good with creamy brie. They're more delicate than grocery store crackers, but our guests agreed that the deliciousness outweighed any inconvenience.

A word of warning - I also made the cheddar and gruyere version and I was so frustrated with them. It took a lot of cheese (that had to be finely grated by hand) and then they froze so solid that even after letting them sit out for longer than I was supposed to they still cracked into giant pieces when I tried to slice them. The final product was decent tasting, but I would never make them again.

Wednesday, December 17, 2014

Emily's shower!


Emily's baby shower was last weekend and it was as lovely as you might expect.

I "cohosted" with two other friends, which was amazing because we divvied up the work and I put dibs on dessert (duh) and went nuts with it. I can't claim any credit for the gorgeous decorations or flowers. I was busy enjoying myself during the party and didn't snap many pictures, but here are a few, followed by some recipe links and info.

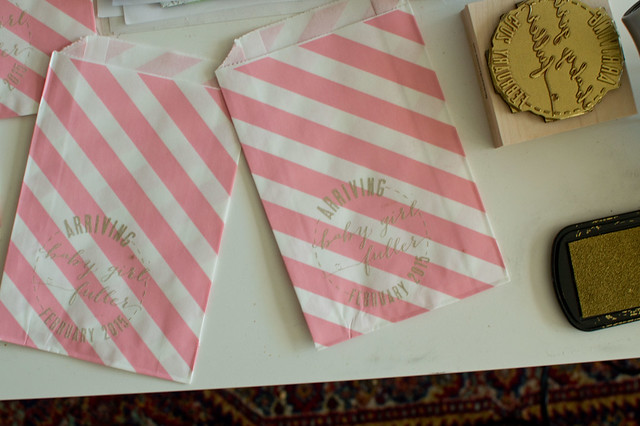
stamping

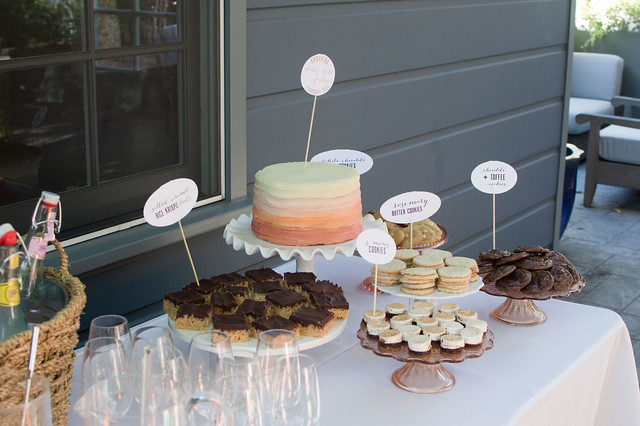
dessert set up

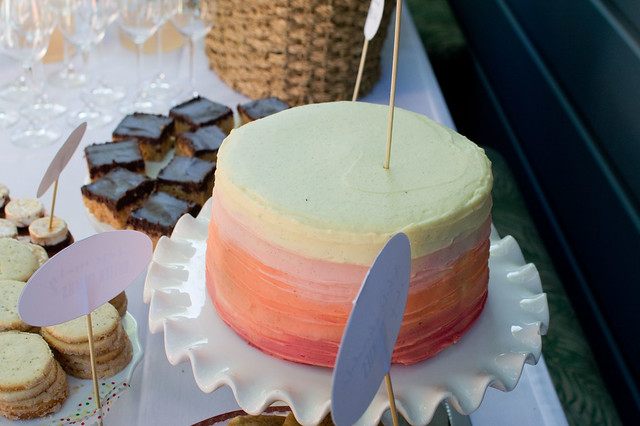
cake!

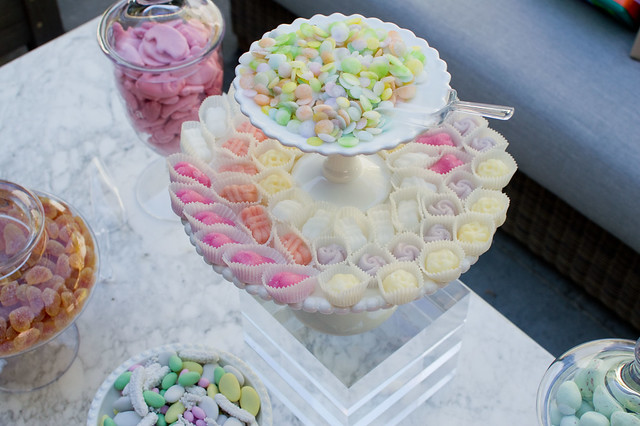
sugarfina candy!

candy bags

to go boxes

Desserts: For the desserts I kept E's tastes in mind (plenty of chocolate, no nuts mixed in) and tried to choose a variety of recipes that would ensure everyone would find something to enjoy. I also wanted to include a couple of desserts that hearkened back to childhood favorites, since we were celebrating the arrival of a child.

For the standbys, I chose these reliably crowd pleasing chocolate cookies (modified to use toffee instead of nuts), rosemary butter cookies, and one of E's favorites -  white chocolate chip cookies (sorry - I just used the recipe on the bag and then threw the bag away without writing it down - bad blogger). For all of these, I made the dough a couple weeks ahead of time and froze it.

I wanted rice krispie treats, but a bit fancier, so I used this recipe for a salted caramel version and they turned out great. The only modification I made was that I used a dry caramel process instead of wet, which is just my personal preference because it's a bit faster. This is just a fancy way of saying that I left out the water the recipe calls for and just cooked the sugar until it turned a nice deep amber and then tossed in the butter, cream and salt.

Emily loves s'mores so I wanted a cookie version. I found several recipes for s'mores bars, picked one, annnnd .... it was a dismal failure. The graham cracker crust was too crumbly and couldn't be cut without falling apart completely. The chocolate layer was overly sweet and hard as a brick. It was a big bummer. I contemplated that pan for awhile and acknowledged that the sane thing to do would be to shrug my shoulders, toss it in the trash and pretend I never planned to make them. There was more than enough dessert without them. It will probably surprise exactly none of you to hear that I couldn't let the dream go and made a new batch that I cobbled together from multiple different recipes. I'm pretty proud of how they turned out and I'll share that recipe soon. Okay, soonish. I should really test them again first so I can give you the yield and everything.

I also made a chocolate cake with cream cheese frosting (used the German buttercream recipe I love and did the cream cheese modification) and decorated it all fancy. I was using this tutorial, and I accidentally made the colors way brighter than I intended and didn't have enough spare frosting to tone it down. The problem with amateur cake decorating is that it's hard to find enough occasions to practice. I'm sure I'd do better next time, but how often do I need a three layer cake? (I did finally treat myself to a cheap cake turntable and actual icing comb, and they made the decorating so much easier)

Drinks: For starting the party we wanted to have a drink option that would be equally delicious with or without alcohol. I opted for this grapefruit shrub and added a bit of lime juice and then cut it with Le Croix grapefruit flavored sparkling water. For the spiked version I added some vodka but with a light hand, since it was only noon. I didn't do exact proportions, but I think it was about 1 part shrub: 5 parts sparkling water: 1/4 part lime juice. For the spiked version, it was about 1 part shrub: 1/2 part vodka: 4 parts sparkling water: 1/4 part lime juice. Again, sorry for the horribly inexact recipe. Things got a little hectic pre-party, as they tend to do.

Small details: One of my favorite ways to add a quick personal touch is with a custom stamp. I think I've mentioned this before, but it's really easy (and not that expensive) to get a stamp made. I've been using rubberstamps.net for years and I like them because they ship quickly and I can usually find a discount code. I use Illustrator for design work, but you could do this in Powerpoint or Word as well, it just might be a little more time consuming!

I used the custom stamp on simple paper bags so guests could take home candy from the Sugarfina candy bar. I smuggled out several bulging bags of candy for myself because they do gummies like no one else does. I used a gold pigment stamp pad and ended up having to emboss them because the pigment ink didn't dry well on the slightly waxed surface of the bags.

I also used the stamp (and embossed it) on bakery boxes I'd purchased so we could pawn off the leftover dessert easily. This is one of my top recommendations for parties with lots of dessert - have something ready so you can send leftovers home. You can get bakery boxes at most cake shops (this is what I did for our wedding) or online (I ordered these ones for the shower and will be using up the rest of them for years).

I always like to make labels for the food so people don't have to choose blindly. I designed these ones in Illustrator, printed them and then just attached them to bamboo skewers. I didn't manage to get any decent pictures of them so you'll have to trust me that they existed.

In order to keep the design consistent I used the same fonts for the stamp and the labels. Miss B is my favorite font person, so I searched her blog for a great handwritten font recommendation, came across Bombshell Pro, and promptly recognized it from E's blog which made it seem like a match made in heaven. I used Bebas and 5AM Gender for the bold font (these two are very similar so I sometimes mix and match them).

It was such a special day and I'm really looking forward to meeting this little girl.

Wednesday, December 10, 2014

Right now


:: Researching dog walkers and feeling a little heart sick over the expense. For this much money I could have a house cleaner come every week (a luxury I have long denied us, citing budget constraints). But Circe > than a clean house. D has been taking her to work since we adopted her, but he's changing jobs and that won't be an option anymore. We're already experiencing major guilt. Also, it's kind of hard to find dog walkers. How do people in apartments with full time jobs have pets?

:: Thinking I should write a post called "things I planned to make for Christmas that I'm obviously not going to have time to get around to" - homemade bitters and needlepoint embroidery would top the list. Next year.

:: Related - wishing that December didn't already feel like it was speeding away from me. I would like to lobby to make Thanksgiving a week earlier. I already feel so behind that I'm not sure it's worth putting up our tree. And I don't even do any Christmas shopping anymore! But I'd like more time for the decorating and the baking and the crafting. You know, the good parts.

:: Getting excited for all the new babies coming our way! I'm helping with three different baby showers over the next month so that's where all my crafting energy is going. I love little party details and want them all to be surprises, so I can't share anything just yet.

:: Feeling extremely uncertain about some of the plot developments in Nashville. Enjoying the love-child drama on Grey's Anatomy (deeply bored by the Callie-Arizona situation). Getting pretty into the current season of Top Chef.

Monday, December 8, 2014

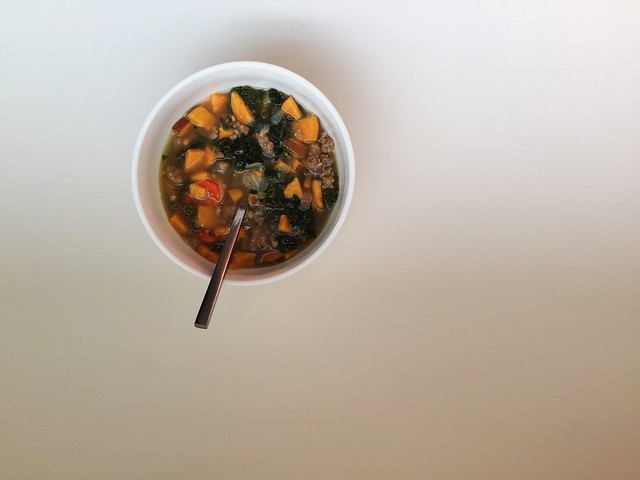
Kale, sausage and sweet potato soup


Another soup that I'll be adding to the rotation.

kale, sweet potato and sausage soup

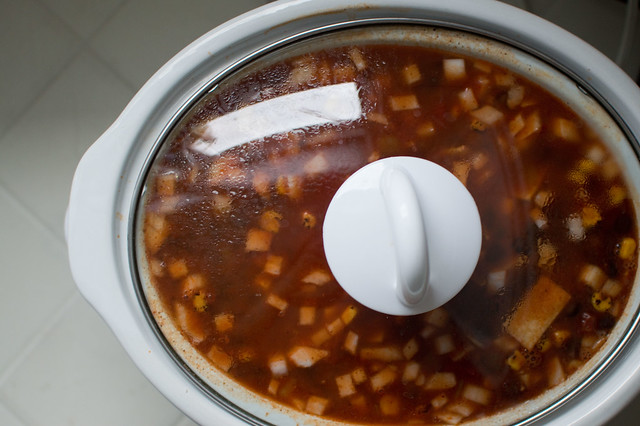
We've already managed to polish off all the turkey stock I made from our Friendsgiving turkey and I'm sad about it (but grateful for the extra freezer space). Homemade stock is like an elixir and it makes everything taste a million times better. I don't have any special method, I just use the crockpot. For a 13 lb turkey I usually need to do it in two batches. I pick as much meat as I can off the bones, then add the bones to the crockpot along with whatever I have on hand (usually a few stalks of celery, leaves and all and a couple sad carrots and some shallots and any fresh herbs I have lying around - this time it was thyme and parsley) and cover it with cold filtered water. I prefer not to add onion, because I think the flavor can be a little overpowering in stock. I let it cook on low for at least twelve hours, then strain it, refrigerate it (you can skim the fat at this point, but I find that bone broth doesn't have much to skim) and portion it into freezer bags for later. It is the best thing.

This soup is a particularly good candidate for homemade stock because it's fairly broth-y. I'm hoping it's still delicious with store bought, since I don't really want to wait a whole year to make it again.

I tweaked this a bit because I wanted to use the sweet potatoes I had on hand and because I like hot sausage.


Kale, sweet potato and sausage soup (makes 6 servings, slightly modified from here)

14 oz hot pork sausage (I got it without casings)
8 cups kale (or more), stems removed, leaves sliced
1 tsp olive oil
1 onion, chopped
2 medium carrots, sliced
4 cloves garlic, chopped
9 cups chicken or turkey stock
2 medium sweet potatoes, diced into 1/4" pieces
Salt and pepper to taste

:: In a large stock pot, saute the sausage over medium high heat until browned. Remove and set aside (can drain on paper towels if you like). You can also cook whole sausages and slice them, as the original recipe suggests.

:: Add olive oil to the pan and saute the onions and carrots until soft (5 - 10 minutes). Add in the garlic and saute another 1 - 2 minutes.

:: Add broth, bring to a boil and cook for 5 minutes. Add sausage and potatoes, cover and cook until potatoes are just starting to get tender (about 5 - 10 minutes, depending on your dice).

:: Add kale, cover and return to a simmer. Cook until the kale is tender and the potatoes are done, about 5 more minutes.

:: Season to taste with salt and pepper. This will depend on your stock (my homemade stuff has zero salt, so the soup needed a bit more than you would with boxed stock).


The sweet potatoes and sausage make this sweet and savory and I feel good about the fact that it gives you a substantial serving of greenery. I crammed two small bunches of kale in there, which I think was more than the eight cups it called for, but who wants to waste time measuring out cups of kale?

Wednesday, December 3, 2014

Pizza (over and over again)!

There is always room to improve, when it comes to pizza. I love my weeknight pizza dough recipe, especially if I'm short on time, but for the last year I've been almost exclusively making this recipe from Nancy Silverton.

pizza dough

First of all, yes, that recipe has 24 steps, which is a little terrifying when you print it out. Never fear, it's actually very, very easy and you can modify it if you need to. I don't make enough bread anymore to justify keeping several different types of flour on hand so I just use bread flour. I also give it an (at least) overnight rise in the fridge because that's more convenient for my schedule, given that I'm rarely at home all day. I find it tastes best after at least 24 hours and the time I left it three days was particularly good. 

I've been playing around with it for over a year, and I'm finally ready to transfer my notes from the scribbles all over the recipe printout I've been using. If you want to try it as written, please go to the original recipe. I think it's well worth reading. 

How many pizzas does it make? If you like a very thin crust pizza, make six portions, as recommended in the original recipe. If you like a very thick crust, make three. Four is the sweet spot for me. Regardless, the finished pizzas will be about 12" across.

We don't generally eat four pizzas at once, but I'll make a full batch of dough anyways. There are a couple options here and both of them are good. To make my own frozen pizza I parbake the crusts until they are just barely golden in patches on the bottom, pull them out and let them cool. Once they're room temp, I'll dress them, place them on a cookie sheet and freeze them, toppings and all. After they fully freeze I wrap them in saran and then foil and store them so we have our own frozen pizzas. Does this save you money? Probably, although frozen pizzas aren't very expensive. It definitely does not save time. I can't justify it very well except to tell you that it's incredibly satisfying to have homemade pizza even though you had a long day and got home at 9 pm.

If you don't want to go the whole way, you can also just pop the extra dough balls into ziploc bags and then freeze them. Pull them out the day before you want to use them and stick them in the fridge to defrost.

And here is my current version of this recipe. For more detailed instructions, which I'm sure will make it even more delicious, see the original.

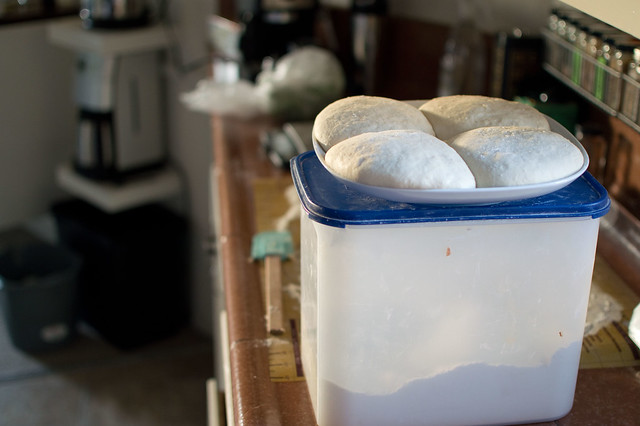
resting dough

Overnight pizza dough - bastardized from Nancy Silverton's recipe

Ingredients

22 oz warm tap water (2 cups, 6 oz)
1 heaping teaspoon active dry yeast
27 oz bread flour + a bit more flour for shaping
1 1/2 teaspoons mild-flavored honey
1 tablespoon kosher salt
Olive oil for greasing the bowl

Instructions

Make the sponge: put 15 oz of warm water and the yeast in the bowl of a standing mixer and let it sit for a few minutes to proof (make sure you get some bubbles so you know your yeast is working!). Add 14 oz of the bread flour and mix at low speed to combine. Cover the bowl tightly with plastic wrap and set aside at room temperature (ideally 68 - 70 F) for about 1 1/2 hours. In the winter I'll do this on the windowsill if there's sun, to help bring the warmth up. If you're heading out the door it's totally fine to leave your sponge to rise for a couple hours longer.

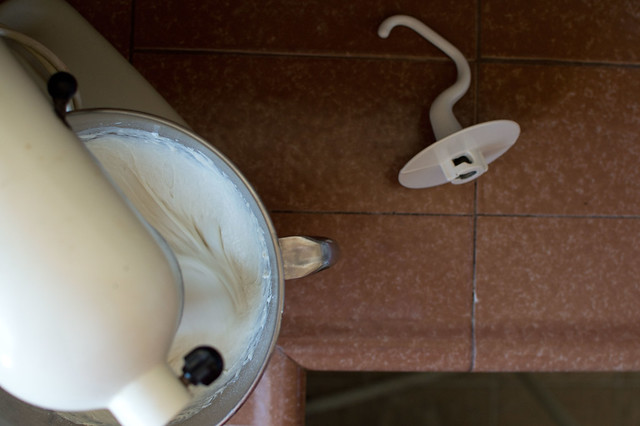
Uncover the bowl and add the remaining 7 oz of water, the remaining 13 oz of bread flour and the honey. Using a dough hook (if you don't have one, just use your regular mixer blade and scrape it more often) mix the dough on low speed for about 2 minutes. Add the salt and mix on medium speed for about 10 minutes, scraping as necessary to keep the dough from creeping up the hook. At this point, the dough should be starting to pull away from the sides of the bowl. It won't clean the bowl completely, but it will start to look more cohesive and it will sort of bundle up around the hook. If the dough is very sticky and wet you can toss in an extra handful of flour, but I've never found this to be necessary.

Turn the dough out of the mixer and into a lightly oiled bowl that has enough space for the dough to double in size. Cover with plastic wrap, set it aside at room temperature for 45 minutes.

Dust your work surface lightly with flour and turn the dough out onto it. Acting as if the round has four sides, fold the edges of the dough toward the center to form a nice ball. Turn the dough over and return it, folded side down, to the bowl. Cover with plastic wrap again and set it aside for another 45 minutes. At this point, I go ahead and stick it in the refrigerator overnight or for a couple days.

When you're ready to make your pizza, dust a work surface generously with flour and turn the dough out onto it. Divide the dough into equal segments. I've found that you get somewhere between 42 and 48 ounces of dough. Nancy recommends dividing into six segments (~ 7 oz each) but I usually do four segments (~ 11 oz each). I find my kitchen scale really helpful here, but you can always eyeball it. Form into rounds, cover with the plastic wrap from the top of the bowl and let them rest for at least an hour. Don't shortcut this, particularly if you refrigerated the dough. It's much easier to work with once it's properly rested.

Place your pizza stones in then oven and turn it on as high as it will go (500 for mine). Leave them to heat while your dough rests.

Get all your toppings ready, then stretch out your pizza crusts. There are different methods for this (see Nancy's detailed description in the original recipe but you'll probably develop your own). Pick up a ball, (do not knead it!) flatten it a bit with your hand and then start stretching it out.  I'm not coordinated enough to do any fancy pizza restaurant flips, but I do a modified version of that, resting the stretched circle of dough over the backs of my hands and then spinning it a bit. This video is almost exactly what I do, if you need a visual. I think the hand stretching works better than rolling with a pin, but it also runs the risk of ripping the dough. If you rip the dough you'll need to knead it back into a ball and then set it aside to rest again. I find dough that has just been kneaded is too springy to stretch out well. It will relax as it rests and it will be much easier to work with.

I do not fuss with a pizza peel but there are great instructions in the original recipe if you want to try it. When I'm ready, I just pull a pizza stone out of the oven, place the stretched dough on it as evenly as I can (you can also adjust a little right after you put it down), dress it with toppings and pop it back in the oven. It's not the pro way to do it, but I've never had success transferring a topped pizza to the stone in the oven.

Bake the pizza until crisp and golden brown. The time is completely dependent on your oven and how thick you rolled the dough. I always check starting at 8 minutes. 

Tuesday, December 2, 2014

Thanksgiving 2014

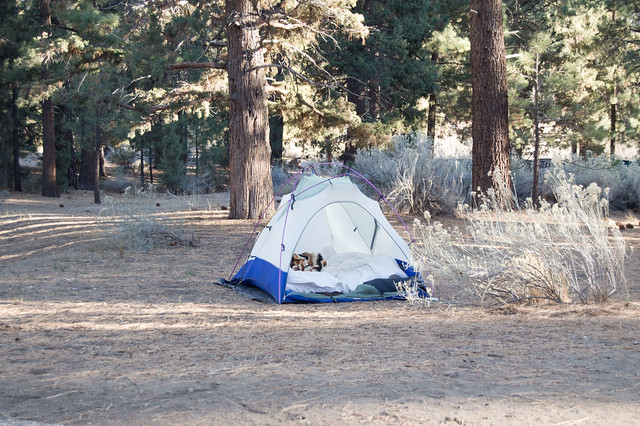
I love Thanksgiving, but D and I have had a hectic few months (year?) at work and when we realized we might not have another chance to take a vacation, we decided to take advantage of the long weekend. We waited so long to organize everything that there were hardly any campsites left but we found a spot in Big Bear, did no planning, threw everything we could think of in the car and took off Thursday morning.

on the way up

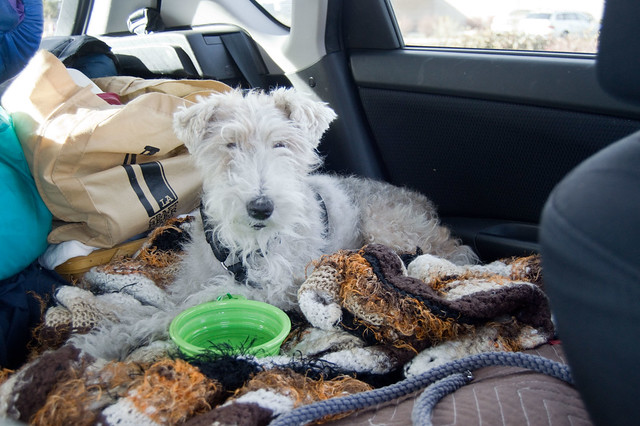
backseat set up

little tent

thanksgiving dinner

Untitled

lakeside

post water

fire starter

campfire

Untitled

Untitled

bertha peak

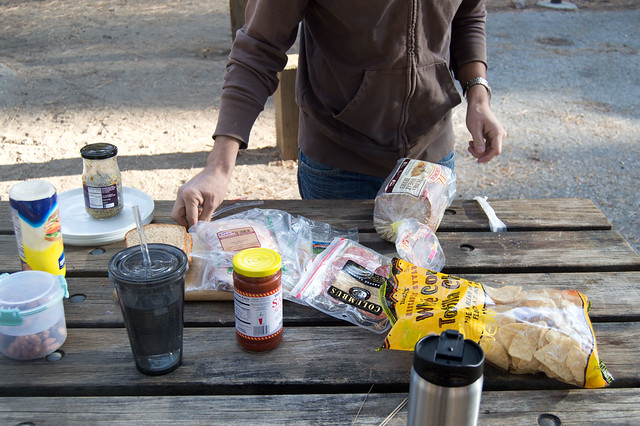
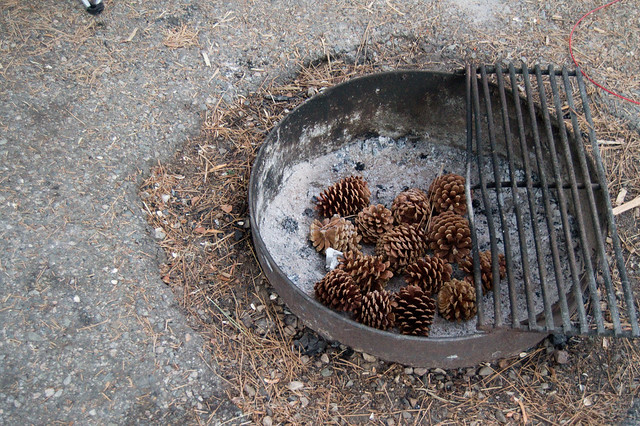
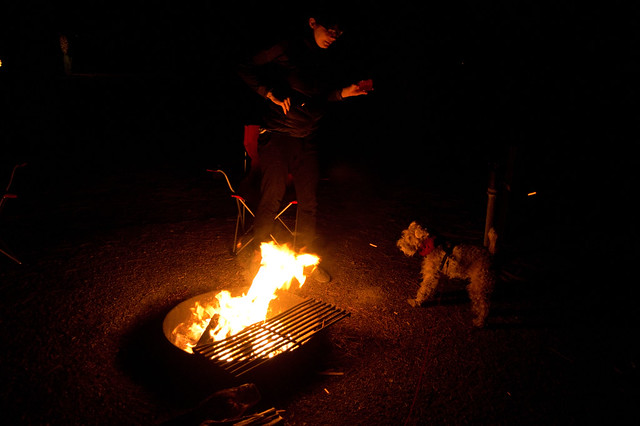
We had sandwiches for Thanksgiving lunch, hot dogs and s'mores for dinner. Circe saw her first large body of water and waded for 45 minutes. We had to keep her on the leash the whole time because there were coyotes everywhere. While we were on that lakeside walk we turned around and found a whole pack creeping along behind us. I'd never been so close to one in daylight! On Friday we went on a 7 mile hike and Circe decided to boycott so we had to carry her the whole time. Cross training?  But she was a wonderful little camper otherwise, snuggling in at night and eagerly exploring the area. I'm very thankful for how unflappable she is about almost everything.

It was a really wonderful, refreshing weekend, and I'm so grateful we were able to make it happen. Of course, we realized we either didn't own or had forgotten: camp chairs (didn't own, purchased while we were there), a propane stove (don't own, decided to live without), headlamps (left at home, gah), towels (drying yourself off with a dish towel in 30 degree weather is not something I'd recommend to anyone), etc, etc.

We're making it a goal to get out more often and our first step is to corral all our camping equipment into a single bin so that it's easier to go on a whim. The second step is figuring out where to store it.

Friday, November 28, 2014

Chicken (or turkey) enchilada soup

In my quest for crock pot meals, this soup is reigning supreme so far. I made it three times in one month, which is pretty heavy rotation even for me.

chicken enchilada soup
{chicken enchilada soup}

The recipe is right here and it works perfectly as is. I have a few small tweaks - I use bone in chicken pieces and just pull the bones out and roughly chop the meat before serving. Bone in is less expensive and it really isn't that much work. I also use the frozen fire roasted corn from Trader Joe's instead of the canned stuff. If you want the soup to be a bit thicker, you can cut a few corn tortillas into strips and toss them in at the beginning. They'll disappear but provide a little more body to the soup.

This is also how I used up the leftover turkey from Friendsgiving. I always make turkey stock from the bones, so I had that on hand. Since the cooked turkey didn't require a long cooking time, I modified it to be a stove top meal by sauteing the onion and garlic in a large pot and then adding all the ingredients except the turkey and simmering for about 30 minutes. I tossed the chopped, cooked turkey in during the last 10 minutes.

Wednesday, November 26, 2014

Bourbon cranberry shrub

I was just going to make my cranberry margaritas again this year, but then I saw this recipe in the January Martha Stewart Living (I wanted the Thanksgiving edition, but I waited too long and January was all they had!). I've been a little leary of the shrub craze, because vinegar in cocktails sounds off putting, frankly. But it was so easy I had to try it.

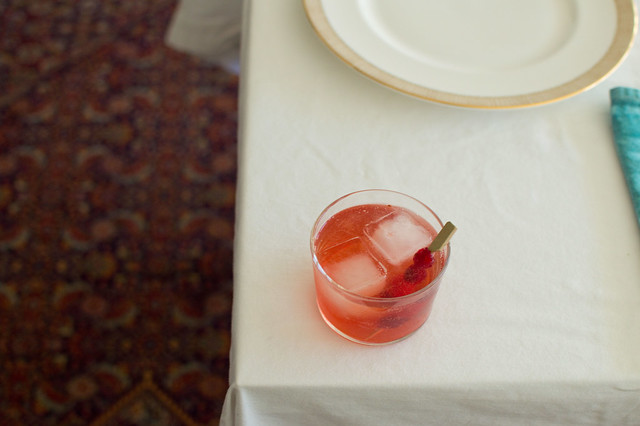
bourbon cranberry shrub

And guess what, I'm converted.

From what I can gather, a shrub is just an old fashioned method of preserving fresh fruit. You use vinegar and sugar and boil the fruit, then it lasts indefinitely in the fridge. The tangy syrup makes a surprisingly refreshing (and not mouth puckering) cocktail.

Another advantage is that it's so dang easy. You can whip up this shrub in less than 10 minutes and all you have to do for the actual cocktail is stir and combine. No shaking, no finicky measuring or complicated ingredients. Just a 1:3 ratio of shrub to bourbon, topped with a bit of sparkling water.

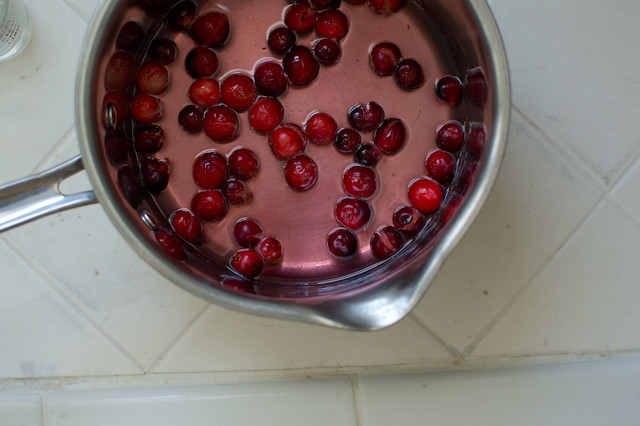
cranberry shrub

Bourbon cranberry shrub (original recipe isn't posted yet - I've tweaked the instructions to make them more clear and converted the measurements to ounces)

Cranberry shrub -
1 cup white wine vinegar*
1 cup sugar
1 cup cranberries

Combine in a pot and bring to a boil, stirring to dissolve all the sugar. MS doesn't specify, but I cook until the cranberries are split but not turning to mush. The cranberries will usually start popping shortly after the liquid comes to a boil and that's when I turn off the heat. I like them to hold their shape a bit.

 Remove from heat and let cool completely. Refrigerate for up to three weeks.

For each cocktail - 
3 oz bourbon
1 oz shrub
1 oz seltzer
+ some of the soaked cranberries

5 oz is a pretty big cocktail in my opinion, so if I'm making them individually I'd split a single cocktail between two glasses. This does make the serving tiny bit small, but better than knocking everyone out before dinner. 

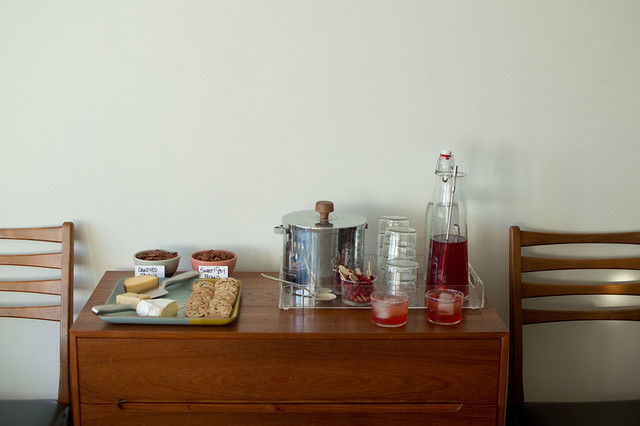
But there's no need to worry about that! This makes a perfect pitcher cocktail as well. I just combined the bourbon and shrub ahead of time at a 3:1 ratio. Three cups of bourbon + 1 cup of shrub worked well for pre-dinner cocktails for 10 adults. I set out a flip top bottle of sparkling water on the cocktail tray and poured the first round for everyone, just doing about 3/4 of the bourbon/shrub mixture and 1/4 water. Then it's easy enough for people to pour their own to their liking. If you want to make it a bit fancy, you can spear the shrub cranberries ahead of time and just use them as the stir stick in each cocktail. Of course, you can also just set out a bowl of the cranberries and a small spoon and scoop them into each drink. 

cocktails


* You do need to use white wine vinegar. In a fit of impatience, I tested this out first with white balsamic vinegar and it was way sweeter and more syrupy. I'm guessing that straight white vinegar would be too acidic. 

Tuesday, November 25, 2014

The best vegetarian gravy

I make this gravy every year because my sister is a vegetarian, but at some point I realized that many of the omnivores preferred it to the turkey gravy. I usually still make both, but if you just want to do one, I think you can rest assured that none of the meat eaters will complain. Bonus - you don't need drippings, so you can make it a day or two ahead of time and just reheat to serve.

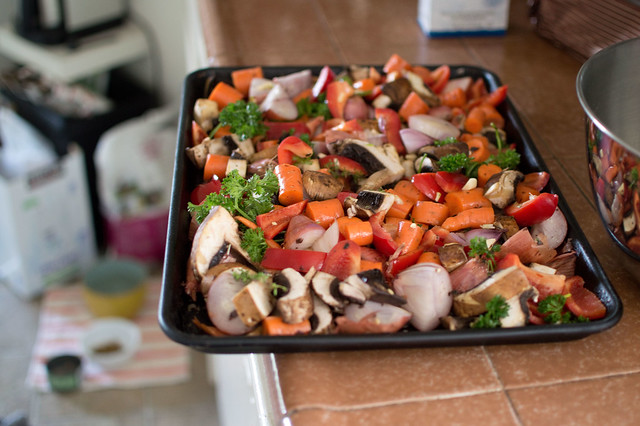
pile of veggies

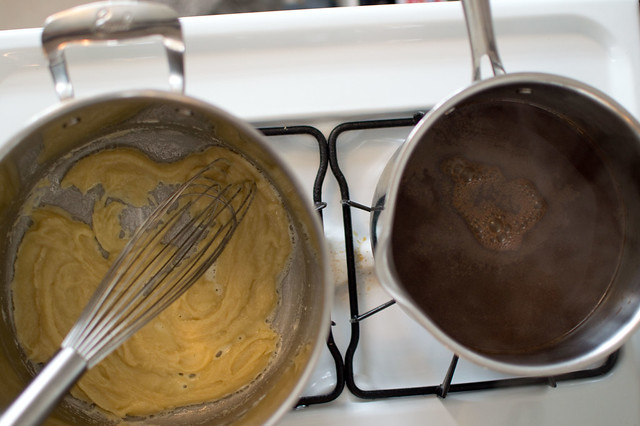
rouxing it

You need to make the stock to start with. You can do this up to a week ahead and just keep it refrigerated. You'll have enough stock to make a double batch of gravy if you need it. If you don't, just freeze the leftovers for later use.

Roasted vegetable stock (7 - 8 cups, original recipe here)
1/2 lb portabella mushrooms, cut into 1" pieces
1 lb shallots, left unpeeled, quartered
1 lb carrots, cut into 2" pieces
2 red bell peppers, cut into 1" pieces
6 fresh flat-leaf parsley sprigs (including stems)
5 fresh thyme sprigs
4 garlic cloves, coarsely chopped
2 tablespoons olive oil
1 cup dry white wine
1 cup canned crushed tomatoes
2 quarts water
:: Preheat oven to 425 F.

:: Toss together all vegetables and herbs along with the olive oil. I use a giant bowl and a spatula to coat everything evenly. Dump everything onto a roasting pan (I find that two half sheet pans give you the best distribution but you can just use one) and roast for 30 - 40 minutes, until everything is tender and golden. Turn occasionally during the cooking process and if you're using two pans, switch positions half way through.

:: Transfer everything to a 6 quart stockpot. Set the roasting pan across two burners. Add wine and deglaze the pan by boiling over medium heat briefly, stirring and scraping up brown bits. Since I use two pans I deglaze each with half a cup of the wine. Pour the wine off into the stockpot and add the tomatoes and the water. Bring to a boil, then reduce heat and simmer, uncovered, stirring occasionally, 45 minutes. Pour through a large fine sieve into a large bowl, pressing on and discarding solids. The original recipe has you season with salt and pepper but I prefer to leave it unsalted and just salt the gravy. Refrigerate and skim off fat if you have any, which I rarely do.

- Stock keeps, covered and chilled, one week, or frozen three months. You'll get 7 - 8 cups out of this. If you're making a single batch of gravy, pour the leftover stock into large ziploc bags and freeze on a cookie sheet so they're flat and easy to store. I also use some of the stock to moisten the dressing, so I keep about a cup out.

Best vegetarian gravy (makes 3.5 cups, original recipe here)
1/2 stick (1/4 cup) unsalted butter
1/3 cup all purpose flour
3 cups roasted vegetable stock, heated
1/4 cup heavy cream
1/2 teaspoon salt
1/4 teaspoon pepper
:: If your stock has been chilled, heat it in a saucepan on the back burner and leave it at a low simmer.

:: Melt butter in a saucepan over moderate heat, then whisk in flour and cook roux, whisking constantly, until a nutty brown color, about 5 - 10 minutes. The darker your roux, the better your flavor, so wait until it smells toasted but don't let it tip over into burned. (The picture above the recipe was about halfway through the process)

:: Add hot stock in a fast stream, whisking constantly to prevent lumps. This will produce a big gust of hot steam at first, so be careful! I usually whisk in half, whisk for a bit to ensure that it's nice and smooth and then add the rest at a slower pace to incorporate it.

:: Bring to a boil, then reduce heat and simmer, whisking frequently, until thickened to desired consistency, about 6 - 8 minutes. Turn off the heat, stir in the cream, salt and pepper.

Monday, November 24, 2014

Thanksgiving scheduling

I know a lot of you are preparing for the best holiday of the year next week. I love, love, love Thanksgiving and the planning is 2/3 of the battle here. A solid schedule will make things go pretty smoothly (although having an arsenal of recipes you trust is also helpful).

I approach every big project in life the same way. Identify the goals, figure out the steps to achieve them, decide what needs to happen when. Remember that you can't do everything at once, so you have to figure out what tasks must be completed at the last minute and which can be done ahead. Thanksgiving is no different.
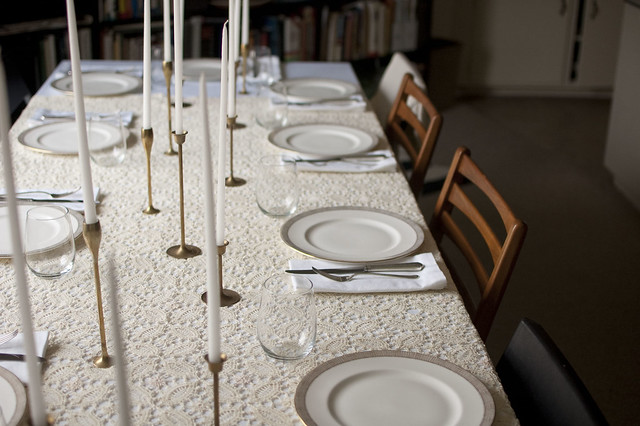
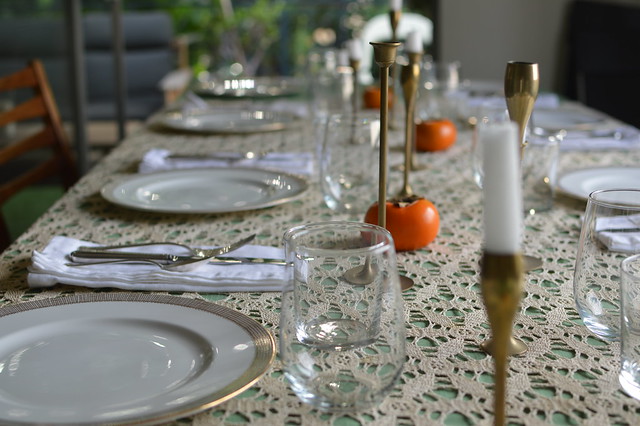
the table, set

I save my schedules and notes each year and then just modify them accordingly. But somehow I completely lost all those papers when we moved the week after Thanksgiving last year. It's pretty heartbreaking, because setting up a new schedule feels intimidating. But it's not really that bad!

Assuming you've decided which dishes you're making and have the recipes handy, you can set up a schedule pretty quickly. Here is my earlier post about how I prep for this. Get your recipes ready, break them down into steps and make sure you include any baking times and temperatures. Now you're ready to schedule. Fill out a piece of paper with the time on one side, in half hour increments. The end time should be when you want to start eating, which I usually set for 30 minutes after I ask guests to arrive if it's family, an hour if it's friends and we're doing cocktails.

Oven space is at a premium. Start with the turkey and work backwards. I only ever use the Alton Brown roasting method, which is pretty quick. I set aside a total of 3 hours for roasting a 14 lb turkey and it often doesn't take that long. I aim to have the turkey coming out of the oven either when guests are scheduled to arrive or a half hour after, so I can tent it and just let it rest until we're ready to serve.

Everything else will need to get worked around the turkey. Rolls are usually best cooked last minute and they're quick, so I plan to do those while the turkey rests. If oven space permits, you can reheat a couple other dishes at the same time, or right after the rolls come out. I try to bake the dressing earlier in the morning and then just set it aside to get reheated right before serving. Ditto on the sweet potatoes except I usually do them the day before.

Do as much ahead of time as possible. That breakdown of steps you made? Go over it and figure out which recipes (or parts of recipes) can be done earlier in the week. I try to choose a few recipes that can be fully made ahead of time to ease up the crunch. Things that can be made a day ahead - these horseradish mashed potatoes, any cranberry sauce or relish, vegetarian gravy (I'll share my recipe tomorrow), sweet potatoes (I don't have a recipe but I roast them, chop them and then top them with a pecan crumble and bake it at 375 for about an hour - it can just get reheated later). I always, always, always make the pies a day or two before. Pumpkin pie in particular benefits from having a day for the flavors to meld, so it's win-win.

There are also pieces of recipes that can be done earlier. If you want freshly mashed potatoes, that's great. Wednesday night you can peel and chop the potatoes, cover them with water and leave them in their pot all ready to go on the counter. They'll be fine sitting like that at room temp for 24 hours, I promise, and then you just have to pop them on the stove when you're ready to boil them. I cube the bread for the dressing and dry it out in a low oven a few days before. I also sometimes wash and chop all the veg for the dressing so it's ready to saute. If you're planning on making gravy you can even just measure out your ingredients and have them waiting by the stove for you. I don't want to be hauling down the bin of flour in that last minute crunch time.

Build in a little more time than you think you need. I mean yes, I'm a huge advocate of scheduling but I want to enjoy the cooking, which means I don't expect myself to crank out dishes at warp speed. This is easier after you've hosted at least once and have an idea of how long things take. I wash my pots and pans as I go along, and then dry them and put them away. Along those lines, take the time to get yourself ready. People would rather show up and be greeted by a clean and pleasant host, even if it means waiting another 30 minutes to start eating, I'm almost positive.

Delegate specific dishes. I always ask people to bring veggie sides while I focus on the core dishes. But you can also delegate desserts, which can be a huge help. Whatever you do, make sure you let people know what to bring. Also, there is no shame in going store bought for things that are just cluttering up your schedule. Those brown and serve rolls will make everyone happy if you don't want to mess with yeasted dough along with everything else.

Remember that you are not a caterer! I have never managed to get everything piping hot and served at the same time. And that's fine. Your guests aren't there for a restaurant experience and you shouldn't feel pressured to provide one. Sure, I make every attempt to make the most delicious meal possible, but if things go wonky just open another bottle of champagne and take a deep breath.

This is just a theoretical example, because everyone will have a different schedule based on the recipes you're using and your start time, but this is an example of what my schedule usually looks like. This is for a late arrival time, so if we're doing a 2 pm dinner I bump it up by 2 hours.

TG schedule

The last half hour tends to be a bit of a flurry, especially if you're making gravy. There isn't really any way around this that I've discovered. You'll be pulling stuff out of the oven, whisking the gravy, hopefully delegating someone to carve the turkey. I just try to work quickly and stay relaxed.

Oddly enough, this is the first year in forever that I'm not doing Thanksgiving. We had some scheduling issues that were going to make it really difficult so I cried uncle. We had some friends over on Saturday so I got my hosting fix and I'm going to relax this year (but also look forward to next year!). I'll share a couple recipes tomorrow and Wednesday and live vicariously through you.
Friday, November 21, 2014

Coming soon!

I really, really wanted to get a breakdown on Thanksgiving scheduling up today, but it's taking longer than anticipated to write it. I'm going to get it up early next week, promise. Hopefully it will be helpful.

persimmons and crocheted lace

In the meantime, there are lots of other Thanksgiving posts. I think it's obvious that it's my favorite holiday.

My Thanksgiving planning process
Thanksgiving 2013
Friendsgiving 2013
Thanksgiving 2012
Friendsgiving 2012
2011 prep + recap
2010 prep + recap (the one where we got engaged)
Thanksgiving 2009

Printable napkin rings
Leaf garland template

Cranberry margaritas
Cranhattans


Thursday, November 20, 2014

Afternoon snack

Every single day for the last several weeks. 

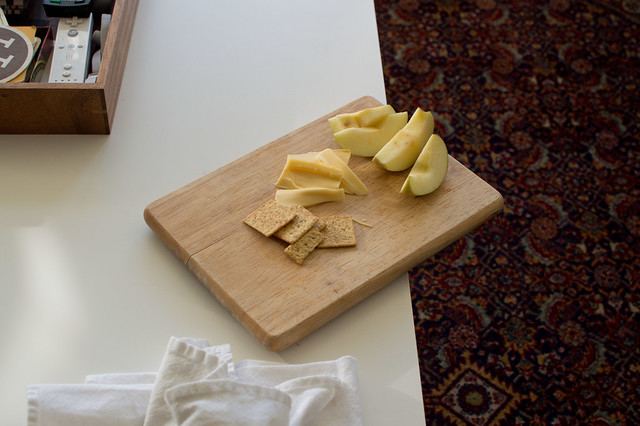
afternoon snack

1 oz cheese + 5 crackers + 1/2 apple. Although it's usually packed in a to go container. 

I used to convince myself that my afternoon snack should be super healthy, like carrot sticks, even though all I really want in the afternoon (always, really) is cheese and crackers. 

I try to avoid eating wheat on a daily basis because too much of it makes my joints swell like crazy. If we have pasta and bread for dinner, I'm resigned to the fact that I'll wake up with "pasta knuckles" the next morning. I choose to work around this because I'm not interested in giving up gluten. So we don't keep bread in the house on a regular basis anymore and I try to keep my pasta intake low(ish) even though I'm in no way gluten-free.

But I've decided that 5 little crackers a day aren't going to kill me and it's been lovely. I'll admit that the first time I brought home a box I ended up eating half of it on the bus, but I blame that on terrible traffic combined with post work hunger. Now that I have them around all the time I don't have an issue sticking to my small serving each day and my joints seem fine, knock on wood.

Speaking of cheese (we were, weren't we?) - am I the only one who gets excited for the holidays in large part because of the cheese platters? Trader Joe's caramelized onion cheddar, I am coming for you. 
Wednesday, November 19, 2014

Black bean burgers revisited

I'm still using my standard recipe for black bean burgers but I've gotten a little better about making them so I'm jotting down my notes.

peppers and onions

black beans

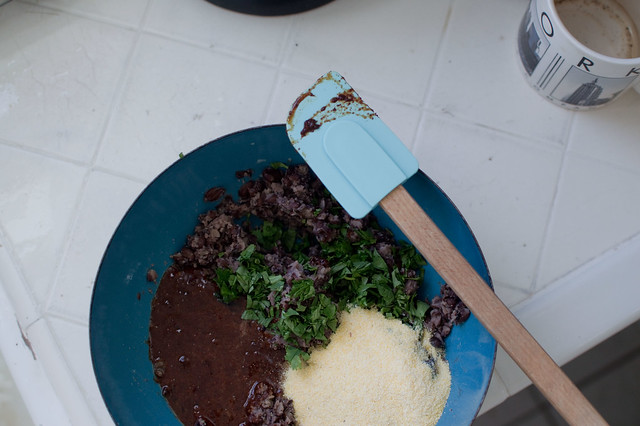
burger mix

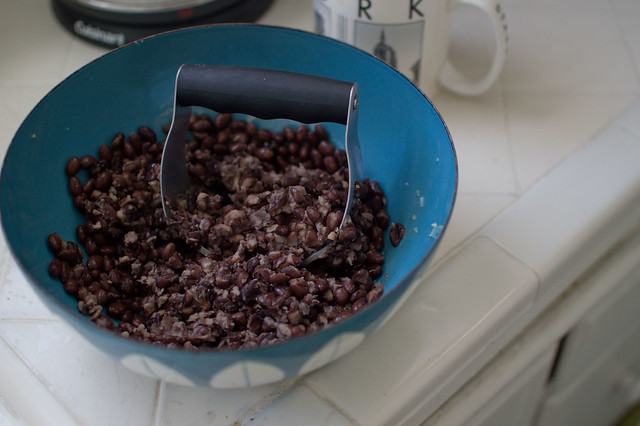
I use the pastry cutter for mashing the beans. The original recipe called for a fork, but mashing things with a fork is not a lot of fun. I used to use the food processor, but it does TOO good a job and can make it smoother than you want. The pastry cutter is perfect. (I also use it for guacamole and for egg salad, but not for pastry, oddly enough).

The dough (batter?) is still really soft, and shaping it was always a pain. I now treat these like pancakes and just use my largest scoop (it's a #12 which is 1/3 cup) to put the batter directly on the griddle. I flatten out the mounds a bit with a spatula. They're delicate, so you have to be careful on the first flip, but they'll firm up a bit as they cook. I don't use a non-stick skillet anymore, just my cast iron griddle with some oil on it.

In addition to the cumin and the coriander (about 1 - 2 teaspoons of each), I also add in a bit of chili powder.

I've also tested out a couple of variations that were good. Sometimes I'll finely dice sweet potatoes and saute them with the onion mixture to get them tender. If you happen to have leftover caramelized onions on hand, those are a great addition. I'm planning to do a version with diced jalapenos for some extra heat. It's a good recipe to play around with.


** I have a lot of information about the kitchen equipment I use the most in this post, if you're ever wondering. **

Thursday, November 13, 2014

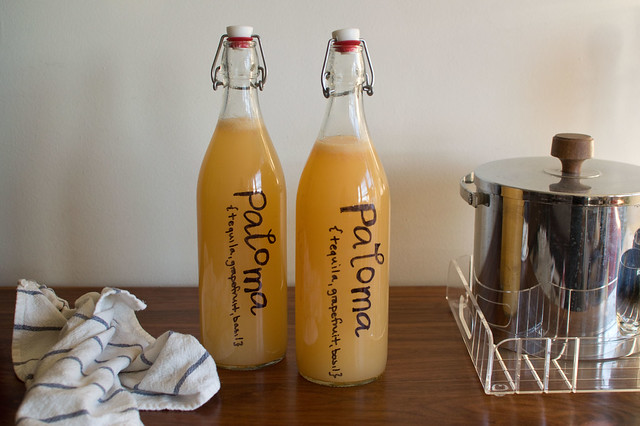
Pitcher palomas

I love margaritas as much as the next person (okay, maybe more) but there are times when all I want is a paloma. Palomas are sort of like stripped down margaritas, consisting mainly of grapefruit and tequila. You can make them in various ways, the least fancy of which is just silver tequila and Squirt.

On Saturday we were going to a party so I wanted something relatively quick that I could pack up and take as a pitcher cocktail. I started with this Rick Bayless recipe but because we were using fresh grapefruit juice (I get it from the Trader Joe's refrigerated section) that has basically no sweetness, I knew we'd need to play with it. I swapped in a little bit of tangerine juice to balance out the grapefruit juice and then made a basil simple syrup instead of just using regular sugar, which I find never dissolves well.

pitcher palomas
{pitcher palomas}

This cocktail will take a bit of adjusting because so much depends on your juice. Have a tasting glass nearby and take tiny sips as you go along so you can get it where you want it.

Pitcher palomas (makes enough for a crowd, about 15 large drinks)
1 1/2 cups lime juice
3 cups fresh grapefruit juice
1 cup tangerine juice (or OJ, or just more grapefruit juice)
4 cups silver tequila (basically a full 750 ml bottle)
~ 1/3 cup basil simple syrup, or regular simple syrup
~ 24 oz sparkling water (I used Le Croix grapefruit flavored water)
Ice, for serving
:: Mix the juice and the tequila together. Add simple syrup to taste. I think I ended up using about 1/3 cup, just enough to take the edge off the grapefruit. If you are using bottled grapefruit juice, which is sweeter, you might not need any syrup at all. If you prefer a sweeter drink, you may need quite a bit more.

:: You can either top with the sparkling water or have it available for people to add to their liking. How much water you add will mostly be determined by the setting. If I were pouring a round of cocktails pre-dinner at home, I might add just a splash of water. But when I make pitcher drinks for parties I tend to use more. People drink more at a party and they drink faster so I find it's better to make the drinks a little lighter so they can sip longer. If you taste as you mix and stick with flavored water, you'll ensure that it doesn't end up tasting watered down, just refreshing.

Basil simple syrup (makes about 3/4 cup)
1/2 cup water
1/2 cup sugar
Large handful of basil leaves
:: Bring the water and sugar to a gentle boil, stirring to make sure the sugar dissolves. Toss in the basil leaves, stir, and turn off the heat. Allow to cool before straining.

You can keep the leftovers in the fridge for a week or two. If you don't have basil, leave it out and just make regular simple syrup.

I always use my flip top bottles when I bring drinks to a party. I write on them with a black sharpie, including a short description of the drink so that people hunting through the cooler can decide if it appeals to them The sharpie will come off with soap and water when you're ready to wash it.

Wednesday, November 12, 2014

Fall meal planning update

I'm still mostly using my meal planning system, although the actual cooking definitely fell by the wayside for most of the summer due to the heat. Instead I tried to plan as many fast, preferably oven-less, meals as possible.

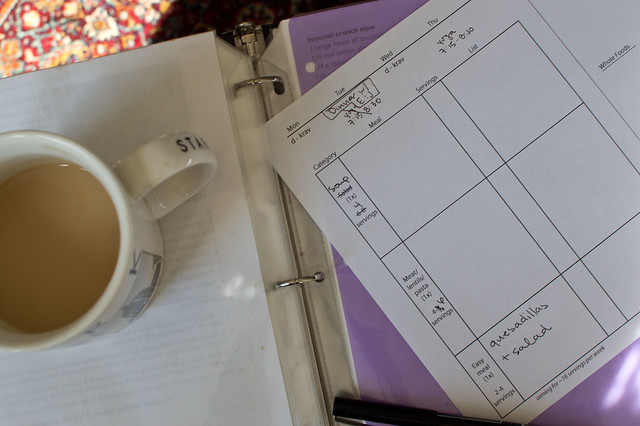
meal planning tweaks

Now that it's starting to cool down I tweaked our meal planning a bit. Soup is sounding more appealing, so I'm subbing out our usual large salad meal for a hearty soup meal. I've also reduced the total servings I aim for each week from 16 to 12. This is because I've been cooking my lunches separately so I don't need to factor them into our planning. When my cooking was sporadic during the summer I couldn't rely on leftovers (quesadillas aren't great the next day) and I kept purchasing lunch, which I hate to do. So much money, so little enjoyment. If I could actually go out to eat I might see it differently but I don't like paying $7 for a lackluster sandwich to eat at my desk.

So, new lunch plan: brown rice + frozen stir fry veg + protein (usually tofu a few times a week and fish or meat a couple times) + stir fry sauce. It's a fake stir fry. And yes, the microwaved frozen vegetables are not nearly as good as fresh would be but this is the fastest, most consistent lunch I've been able to come up with. It takes virtually no effort and hits all the key nutritional groups I need to feel good. All I really have to do is remember to cook a batch of brown rice on Sunday evening and purchase some tofu. I don't even bother pre-cooking the tofu most of the time. This is where it really comes in handy that I can eat the same lunch every day and not get bored.

And my new meal planning structure looks like this:
Soup - 1x per week, 4 - 6 servings
Meat/lentils/pasta - 1x per week, 4 - 6 servings
Easy meal - 1x per week, 2 - 4 servings

I just need to round up some hearty soup recipes, preferably including a few that can be done in the crockpot. I've been searching around and hopefully I can share some as I try them. I love the crockpot, but the most common recipes you find are usually meat based and we try not to eat meat all the time. I'm hunting for vegetarian recipes as well and there are some that look pretty awesome.

More meal planning posts here.

Tuesday, November 11, 2014

The weekend

If I had realized it was going to be 90 degrees on Saturday I probably wouldn't have committed myself to spending all day in the kitchen.

kitchen saturday
{kitchen saturday}

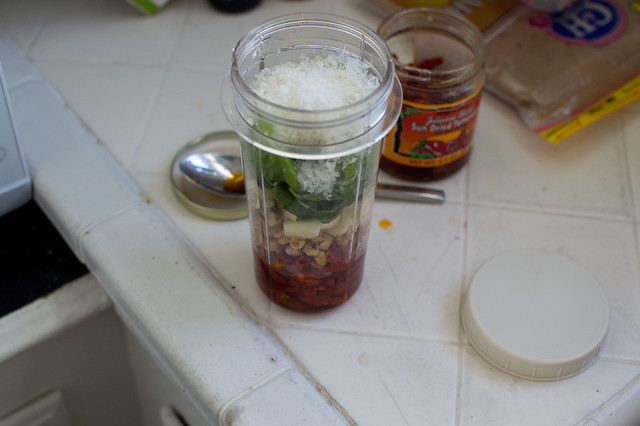
sundried tomato pesto
{sundried tomato pesto}

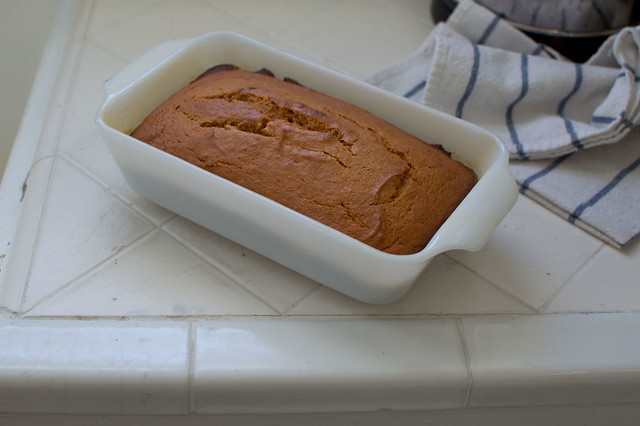
pumpkin ginger bread
{pumpkin ginger bread}

juiced
{juiced}

salted
{salted}

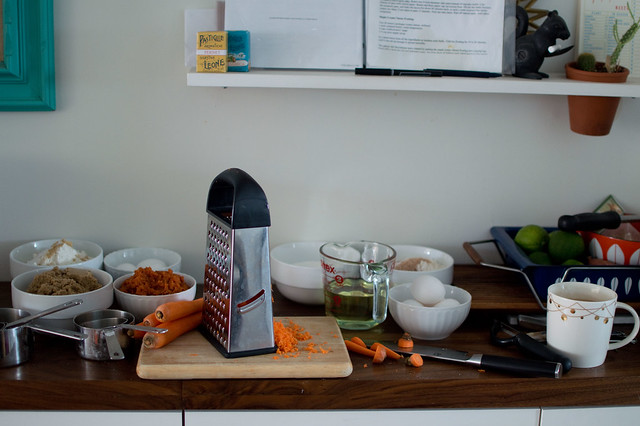
It was still nice to get back in there so I won't complain. We had a family birthday party on Sunday (not pictured, because it was a whirlwind) so I was prepping for that by making carrot cake cupcakes and my favorite picnic food, pressed sandwiches (grilled veg + pesto and prosciutto + mozzarella + sundried tomato pesto). Since I was already in there I tested out a pumpkin bread recipe I hadn't tried before. It had a lot of pumpkin flavor but not nearly enough spice for me. I'll hunt out a new one.

Saturday evening we were veritable social butterflies, at least compared to our usual standards. We went to Brendan Ravenhill's new studio opening and ogled over light fixtures. Then we headed to Lily's gallery opening and ogled over her gorgeous paintings. Then we went to a party at our friends' house and hung out until midnight at which point I cried uncle. My stamina has gone way down, guys.

Monday, November 10, 2014

Care package

Way back in August we took that last minute trip up to the bay area to help my sister and her husband move into their new place. What I didn't share at the time is that the reason we ended up going up with them was because my poor sister was suffering through the most miserable morning (and noon, and night) sickness I've ever seen and we didn't want her to make the long drive.

I also wanted to put together a little care package for them, since moves are the worst, even when you aren't feeling terrible. We might be completely grown up, but I'll still never get over the impulse to be an overprotective older sister.

care package

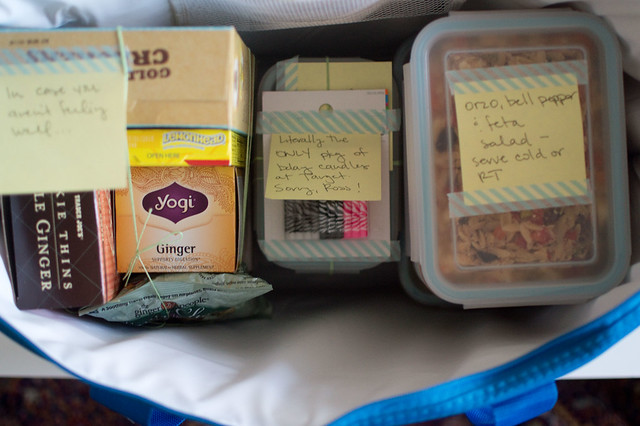
I am far from an expert but I dug around on the internet and then just winged it. All the ginger goodies I could pick up (chews, cookies and tea from Trader Joe's) plus some lemonheads in case the sweet-sour thing could help. Ritz crackers, which I don't think she ended up being able to eat, but hey, you have to try everything! Pretty sure the ginger thins ended up being the biggest success.

I wanted them to have a couple meals in the fridge so I put together my favorite orzo salad, then panicked because I realized it has a lot of garlic which might be super unappealing to a pregnant lady so I added a giant tub of baked mac and cheese. Brownies and candles for her husband, since his birthday was the day after we left and I knew there was no way they'd have a functional kitchen yet (seriously, the timing of this move was rough in all kinds of ways). I packaged everything in a set of the glass snaptop containers that I'm completely obsessed with. Seriously, they are the best and Macy's puts them on sale regularly, so keep an eye out.

I'm happy to report that she's feeling much better now and I'm over the moon with excitement to meet the new baby in March! Expect to see a lot of weekend Oakland trips in the spring.

Thursday, November 6, 2014

Year six

I didn't want to write this year either. I actually thought I had a draft where I'd been typing my notes, but no, just this blank page that I need to somehow wrangle my thoughts onto. I thought maybe I'd just skip it, but I can't quite do it. I'm grateful to have posts from each year to look back on even though writing them is hard - years one, two, three, four and five here.

Today marks the sixth year anniversary of Dave's bicycle accident. Last year I had just finished dealing with a crisis and was so, so angry. This year I feel pretty defeated. Nothing is getting better and I'm starting to realize that I have to let go of it a little if my life is ever going to move forward. I've been trying to take steps towards letting go, but it's a terrifying, guilt ridden process. Looking back, I realize that I said I was going to do this last year and I've only been partially successful.

Here's the thing - my default mode is to be a "fixer" in all situations. I can google like a pro, I can make lists of action items and resources and steps to take. But I can't fix this and not only have I exhausted myself trying, I've ended up in a position where all my energy and resources over the last few years have gone towards trying. I just haven't had anything left to invest in myself or my career or my relationships with people I care about, including my parents, which seems ironic, since I spend so much time thinking about them. But a relationship based solely on problem-solving isn't really a relationship, and I'm starting to feel it.

Fixing is comforting. It keeps me busy and distracted. I don't have time to feel sad often because I'm constantly going over a to do list in my head. Appointments and phone calls I should make (when the hell do people who work full time make phone calls when most offices are only open during the hours you are also working? it's a dilemma), places I should check out, strategies we maybe haven't tried yet. My mind is always going and it numbs me out a bit. Sure, I feel frantic and stressed and angry that I have to do all this. But sad? I haven't let myself feel sad in a while. Sad is depressing. Sad is admitting defeat. Sad is something that you can't just fix and I have a hard time accepting that.

So this summer I decided to try just letting myself feel sad. Or angry, or whatever. I would sometimes come home and just lie on the floor in the dark for 30 minutes and listen to music and actually let myself think about my feelings. It was a little bit like being 13 again, but with fewer zits. And yes, it was sad. I was essentially throwing myself a long overdue pity party and not even attempting to distract myself from it. It was uncomfortable and awkward. I am not a lie on the floor and cry type of person but eventually I needed to stop banging against a wall and actually lean into it. Honor the sadness and hope that I could start to move on from there.

I wish I could tell you that I had an amazing breakthrough and am now totally in touch with my emotions and also magically found a solution to this situation. I didn't. I still backslide a lot, and catch myself putting up walls because it's so much easier, this habit, even if it leaves me cut off and angry. I still feel responsible for fixing my parents' lives or at least finding solutions to make them more livable. I'm still terrified because I know that at some point in the near future the burden of taking care of Dave 24/7 is going to break my mom down completely and we should be coming up with a solution in advance of that and we haven't. I don't have the energy. I need to spend a bit of that energy on myself, because I've been paddling in place for the last six years, barely able to get myself to move into a new apartment, let alone contemplate my own future. I keep telling myself that I'll pick up the pieces of my own life later, once I've resolved everything. But this isn't going to resolve. It might only get worse. And I don't know how many years the rest of my life can wait on hold.

I don't know how to get over the crippling guilt I feel when I make the decision to cut back on family time in order to have more time with Dustin, or with our friends, or just by myself. I've tried to do it this year because it's the only way forward I know. The first Saturday I woke up and realized I was going to spend the entire weekend in my own apartment, without any trips down to my parents or any major events, I actually felt at loose ends. What do people do with free time? And had I really had so little of it that I couldn't remember how it felt? The enormous, unbelievable luxury of waking up slowly and doing normal things, cleaning the house and drinking tea and walking the dog and reading a book and doing laundry. The lingering anxiety that surely I was forgetting something because not following a complicated schedule of obligations seemed unbelievable. I'm trying to make sure we keep at least two weekends a month free. It's harder than you'd expect and it's still never really enough time, but it's something.

So this is where I am, moving forward in starts and stutters, trying to rebuild my relationships as best I can, trying to honor the sadness without letting it consume me. I need to spend a little time fixing myself before I can keep on with fixing anyone else. I can't really see my way forward right now but I'm trying to believe that there's a path somewhere. I have to start taking some steps in the fog and just hope that I find it.

Wednesday, November 5, 2014

Mops, and other exciting things (just kidding! it's only about mops)

I already waxed ecstatic about my Roomba on here, so this post probably won't surprise anyone. Blogs are tough because whenever I get excited I want to share something with you, but I think I'm supposed to be getting excited about wall weavings and fancy new candle scents. And I do like some of those things! But I really, really like gadgets that make my chores easier.

I grew up cleaning floors on hands and knees and while I've tried to make a transition to a Bona type system (which is basically an upscale Swedish Swiffer, in case you don't spend your spare time thinking about cleaning products) I always reverted back. Especially after I bent the handle of our Bona by trying to scrub too hard. I really like to put my back into it, I guess. I needed another solution.

new friend
{new friend}

I've had this Bissell floor steam cleaner for a month and it is a game changer. Our floors have never felt so good. It doesn't use any cleaning products, just distilled water. It comes with two pads and they're machine washable (but they have to be air dried, so don't toss them in the dryer. I have no idea what will happen if you do, but I'm not taking any chances).

Basically, you fill it with water, plug it in, wait for it to warm up and then select your steam level. I use level three on my tile floors and level two on the wood. Then you just run it over the floor, not too fast. The contact time matters since you aren't physically scrubbing and you want the steam to have a chance to work. I just run the cleaner along the floor at a slow pace. If you have a stubborn spot, you just hold the steamer in place for 10 seconds or so and it usually steams it right off. The head swivels well so getting into corners and under furniture is easy. The floors feel amazing when I'm done and because it's so quick I end up cleaning them once or twice a week.* I won't tell you how often I was cleaning them before because then you'll be horrified.

The only thing that drives me a little nuts is that there is no on/off switch. You have to physically unplug it to turn it off. This is incomprehensible to me. Every other appliance I own has an on/off switch so it can't be super advanced technology. Backtracking over freshly steamed floors in order to unplug the machine, while the machine itself is still spitting out steam, is a bit of a pain. EDIT - This is my fault for not reading the instructions. You can turn the mop off by pressing the steam level button a few times. It will rotate through each level and then turn off.

One note - some of the reviews are annoyed because you have to sweep the floors first. Um, duh. A steam cleaner is not a vacuum. This is exactly the same process as mopping your floors. Of course it would be nicer if the steamer also sucked up all your hair for you (I'm half convinced that I'm going bald, based on the amount of hair I vacuum up regularly) but that isn't how it works.

* As I write this I realize it 100% sounds like a glowing sponsored post. It is not. To date, I have never run a sponsored post and while I don't anticipate doing so, I would certainly give you a heads up if I did. There are a ton of steam cleaners on the market. We checked out the reviews and the prices and finally ordered this one, which is the most basic model available. Bissell has no idea that I exist, let alone that I'm in love with their glorified mop.

Tuesday, November 4, 2014

Lemon bar quest

About those lemon bars ...

I love lemon bars but I don't make them often enough to be loyal to a particular recipe. I've had a couple of flops where the lemon custard didn't set up well and I was left pretty disappointed, considering the number of wasted lemons, not to mention the butter.

This time around I went with an Ina Garten recipe and I think I can say it was foolproof and pretty delicious. The lemon custard is fairly firm, probably because it has a bit more flour in it than I'd expect. The shortbread crust is tender but sturdy enough not to fall apart too much. Maybe I've found my one and only? Although I still want to try the Smitten Kitchen whole lemon version. I was afraid to make it this time because I've had a couple of mixed results with the whole lemon tart and I knew I wouldn't have time to make a second batch if the first one failed.

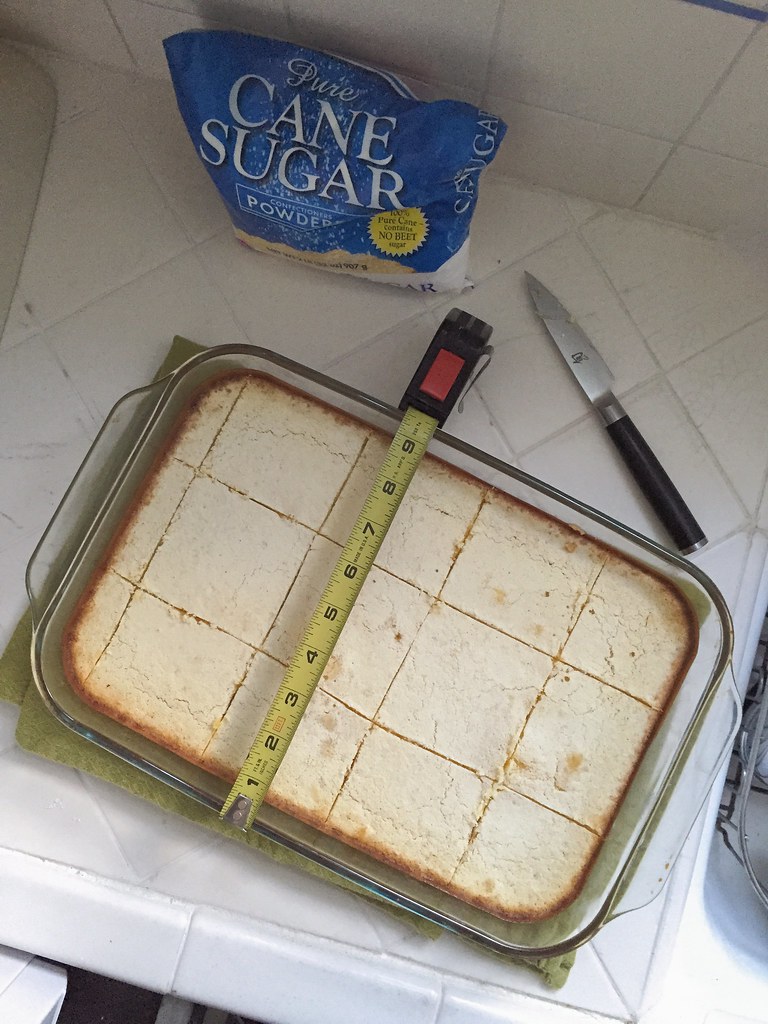
Since these were for a baby shower I wanted them to look as profesh as possible. My lemon bars usually aren't pretty. It's hard to get clean edges or even sizes when you're cutting through a layer of custard. This time I decided I was going for it and tried to be really careful.

Lemon bar grid
{lemon bar grid}

First I chilled the lemon bars overnight. The next morning I cut squares that were approximately 3 inches, with the help of the measuring tape. Then I made two diagonal cuts on each square to get four triangles. I ended up rejecting some of the edge pieces but everything else looked nice and even. You'll have to take my word for it because after I'd spent 40 minutes cutting up lemon bars it was kind of a frantic rush to get out the door on time.

Monday, November 3, 2014

Lately

Whew. It's been a while.

morning light
{morning light}

cooking!
{cooking!}

lemon bars
{lemon bars}

bowtie cookies
{bow tie cookies}

helper
{helper}

I wish I had something exciting to share but I've got nothing. Just run of the mill life stuff like spending most of my energy on work and distributing whatever I have left as best I can. It hasn't been very picturesque, let me tell you.
A few little things ...
:: I know people claim that we don't have seasons here but I think they're just (much) more subtle. I'm enjoying the fall light, even if the fall weather is slow to catch up. I'm normally loathe to give up summer, but that last heat wave nearly killed me and now I'm grasping at any hint of chill in the air even if it means I won't see daylight for several months. It was cold enough this weekend that I'm looking forward to ending my nearly uninterrupted summer kitchen boycott.

:: Okay, I have spent a little time in the kitchen. I've been basing our cooking nights on the weather report, so I manage to get in there occasionally. Things I have cooked in the past three weeks: one enormous pot of linguine, lemon bars, a double batch of sugar cookies, countless quesadillas. The baked goods were for a dear friend's baby shower and I managed to frost the sugar cookies on my own. Sugar cookie decor is not my forte, but Emily's tips saved me. I think the key is the long, slow mixing. I always beat the hell out of my royal icing, which works perfectly for gingerbread houses but is terrible for sugar cookies. I think I erred on the too-soft side and the icing sort of bled together, but I'm improving!

:: Circe always helps with the vacuuming by lying on the floor directly in your path and then nonchalantly moving out of the way at the last second. I think she's just trying to prove how un-intimidated she is by the whole process.

Not pictured - we had a beloved out of town friend visiting last week and used it as an excuse to eat all the things. I kind of wish we hadn't finally tried Pine and Crane because it was as good as everyone said and so affordable and now all I want to do is pick up their dan dan noodles every night.